.svg)

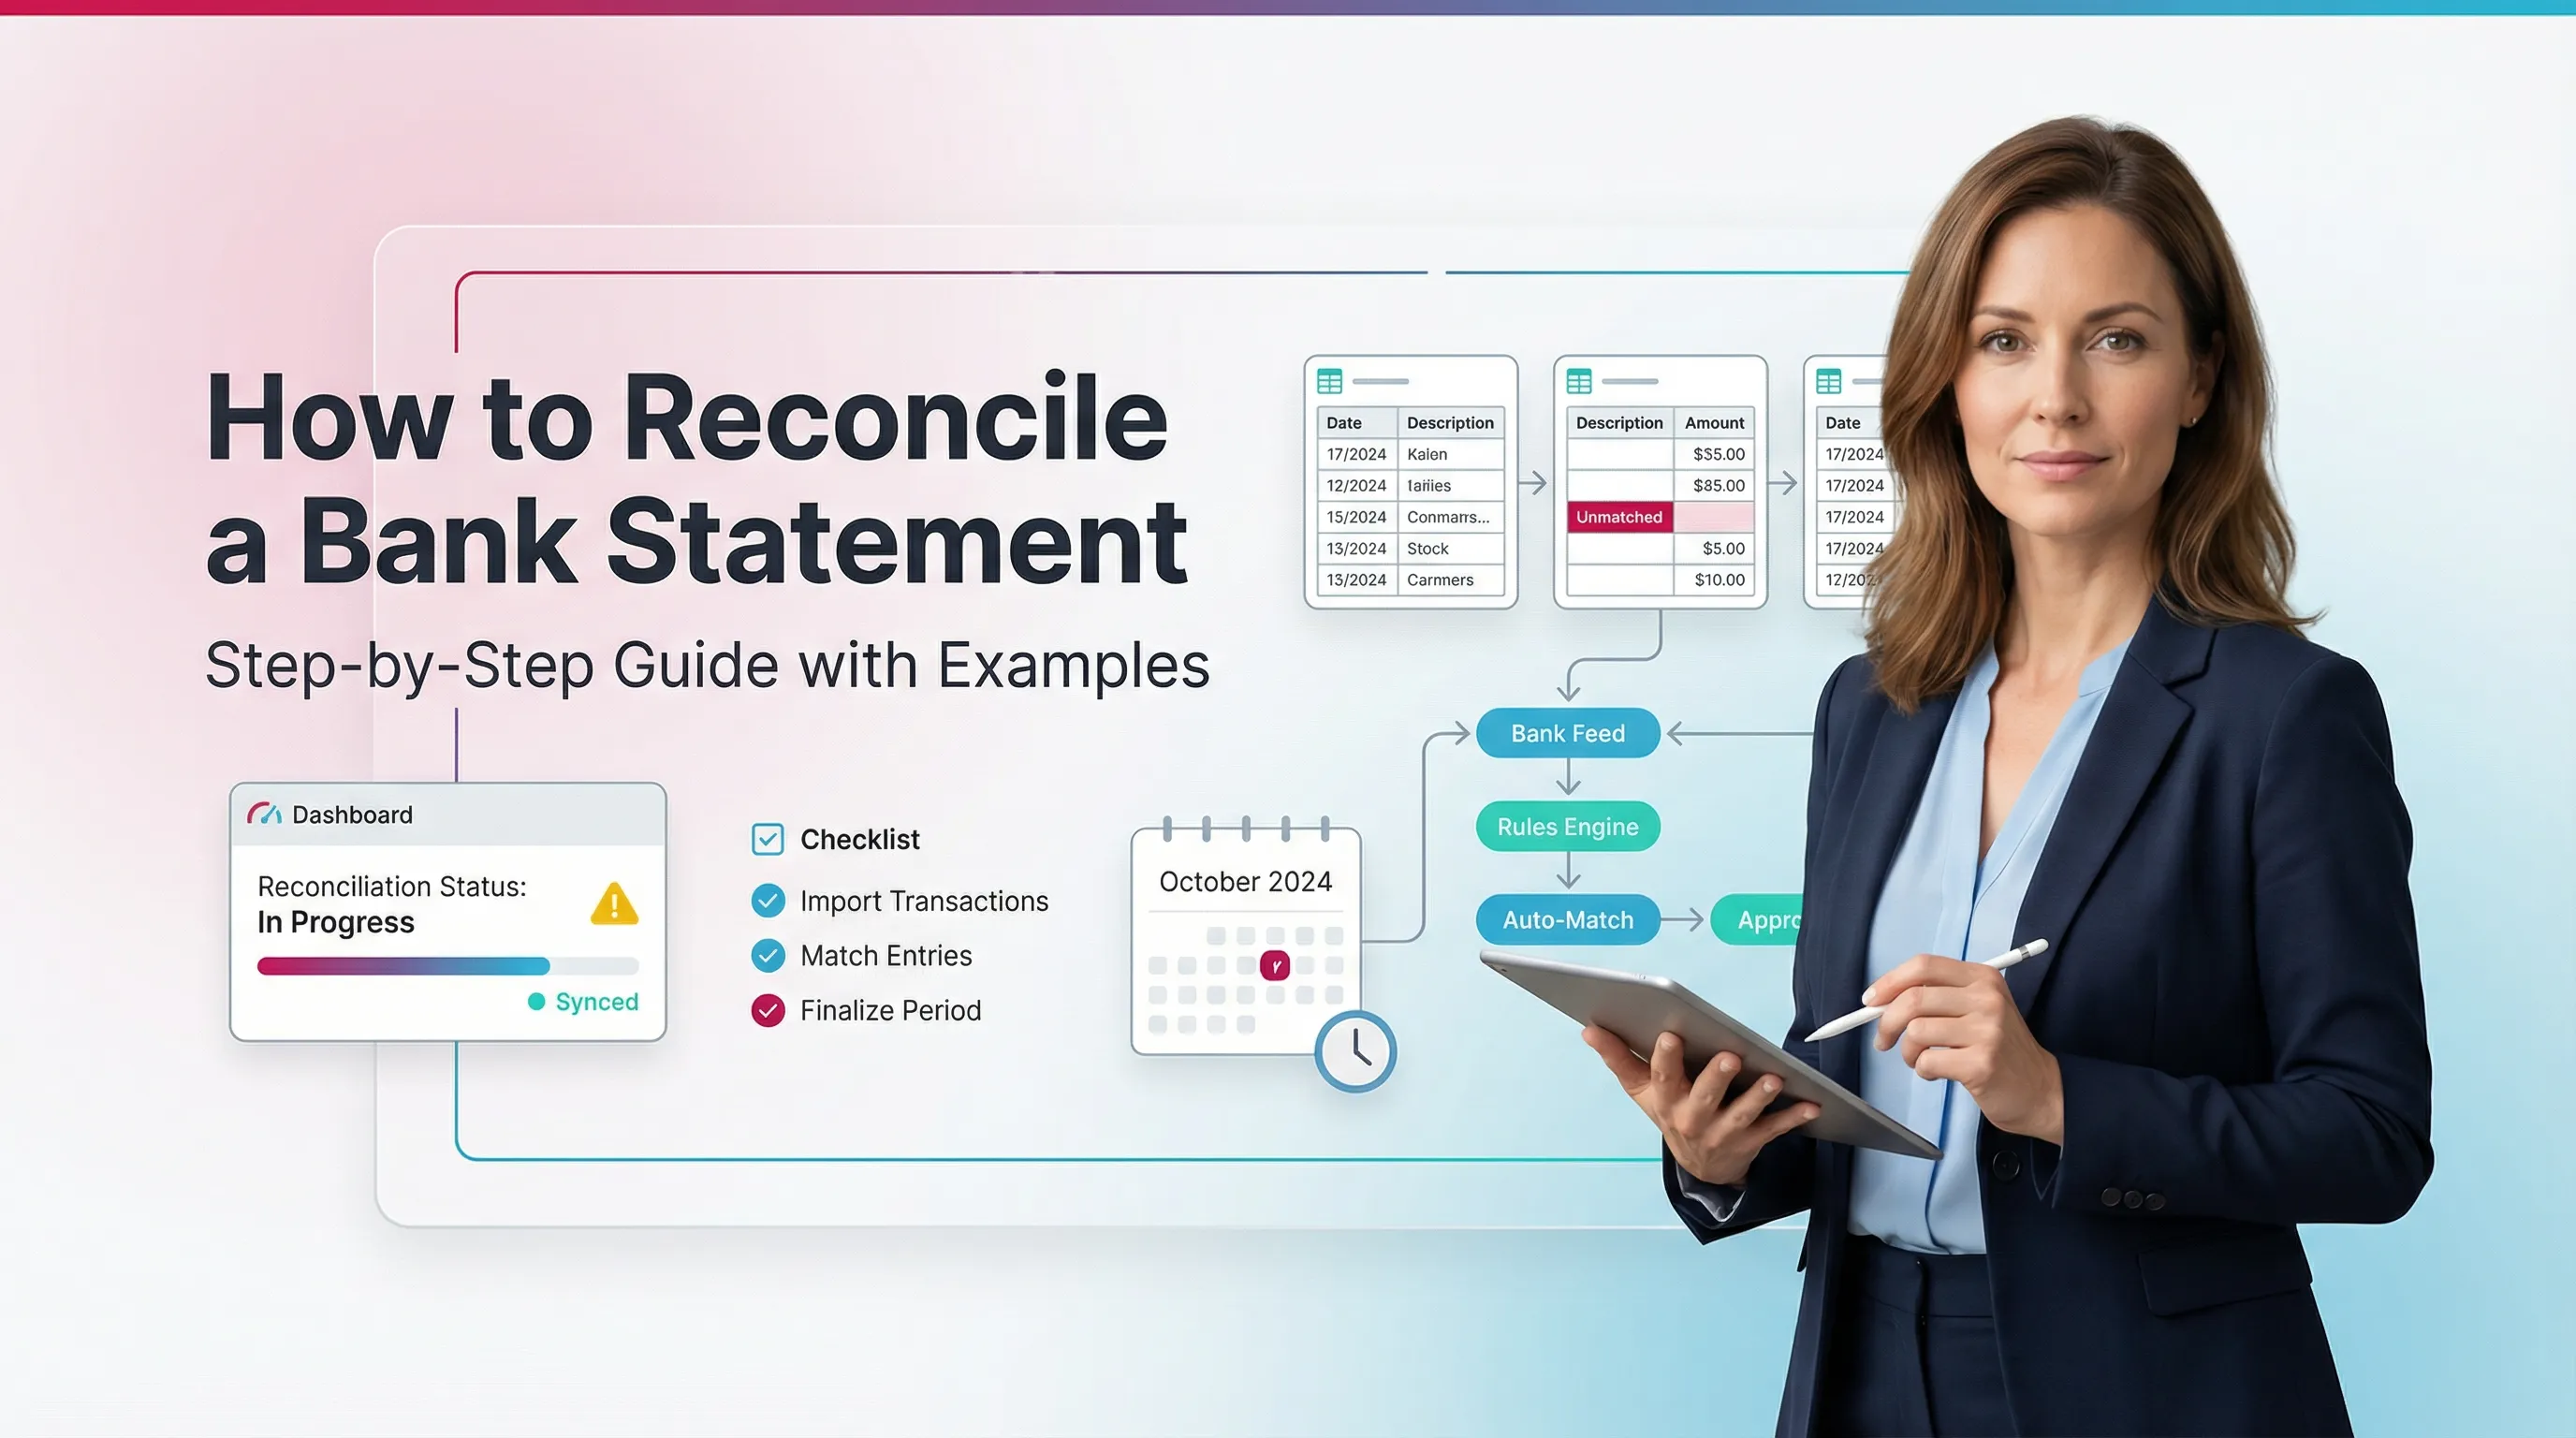
How to Reconcile a Bank Statement: Step-by-Step Guide with Examples
.jpg)
Blog Summary / Key Takeaways
- A bank reconciliation matches your bank statement to your cash GL.
- You reconcile by matching activity, then explaining differences.
- Most differences fall into two buckets: timing or errors.
- “Done” means adjusted bank = adjusted books and difference = $0.00.
- A strong monthly bank reconciliation also saves support and locks the period.
How Do You Reconcile a Bank Statement?
You reconcile by matching your bank statement to your books. Then you post bank-only items and fix errors. Finally, you prove the adjusted balances match.
- Featured-snippet-ready summary (4 steps)
- Compare the bank statement to your books (GL cash register)
- Identify timing differences and missing/incorrect entries
- Record bank-only items in the books (fees, interest, returns) and correct errors
- Confirm the adjusted bank balance = adjusted book balance and save support
- What “done” looks like: reconciled difference = $0.00, with documented exceptions and cleared items tracked forward
This is the core of how to do a bank reconciliation. It also matches how most teams run a monthly bank reconciliation during close.
What Is a Bank Reconciliation?
A bank reconciliation matches the transactions and ending balance on a bank statement to the cash account in your accounting records. It explains any differences with support.
Why it matters in real close work (not theory):
- You catch missing transactions, mis-postings, duplicates, and fraud signals.
- You prevent cash errors from flowing into AP, AR, and reporting.
- You create a repeatable close control with a clean trail for reviewers.
In practice, I see reconciliations fail for one reason. People treat them as a “click-to-zero” task. They stop looking for what changed, what aged, and what looks wrong.
Bank Reconciliation vs. “Reconcile Bank Statement” in Accounting: What You’re Actually Reconciling
In reconcile bank statement accounting, you reconcile two views of cash. Your books show what you think happened. The bank shows what actually posted.
Books Side
- Cash account in the GL
- Sub-ledgers or feeds (if applicable)
- Outstanding items list (uncleared checks, deposits in transit)
Bank Side
- Posted deposits and withdrawals
- Bank fees, interest, NSF or returned items
- Bank corrections and chargebacks
The reconciliation explains why these two lists do not match line-for-line. Therefore, it becomes one of the most important controls in the close.
What You Need for a Monthly Bank Reconciliation
You move faster when you start clean. You also reduce “mystery breaks” that come from missing inputs.
Documents & Data
- Bank statement for the period (PDF + CSV if available)
- General ledger detail for the cash account
- Check register or disbursement listing (if checks are used)
- Deposit detail or cash receipts listing
- Prior month reconciliation (to roll forward uncleared items)
If you use downloads or a bank feed, still pull the statement PDF. Feeds miss items and can shift dates.
Setup Checks
- Confirm the correct statement date range
- Confirm the correct bank account and currency
- Confirm last reconciled date and starting point
- Ensure all bookkeeping for the period is posted (or clearly staged)
Practical tip from the field: set a cutoff time. For example, “No new AP postings after day 3 of close.” Otherwise, cash keeps moving while you reconcile.
The Bank Reconciliation Process (Step-by-Step)
.webp)
This bank reconciliation process follows a sequence that works in real close work. It also fits the common bank reconciliation steps people expect to see.
Step 1: Confirm the Starting Point and Ending Balances
Start by writing down both ending balances. This prevents you from chasing the wrong target.
Record:
- Statement ending balance
- Book ending balance (cash GL balance as of statement end date)
Then verify the prior reconciliation ties out. You should not carry a prior-period break into the current month.
If the prior month did not tie to $0.00, stop. Rebuild from the last known good point. You will save time overall.
Step 2: Match Transactions
Match in the same order every time. Deposits first. Then withdrawals. This reduces rework.
2.1 Match Deposits (Cash In)
Match statement deposits to:
- Customer receipts
- Settlements from processors
- Transfers between accounts
- Merchant deposits
Common matching issues:
- Batching by merchant processors
- Net deposits where fees get withheld
- Deposits posted to the wrong income or clearing account
If you process cards, expect statement deposits to differ from invoices. The processor often batches multiple days into one deposit.
2.2 Match Withdrawals (Cash Out)
Match payments to:
- Bill payments
- ACH and wires
- Checks
- Card activity (if commingled)
Watch for:
- Duplicate entries (feed + manual entry)
- Reclassified transactions after initial posting
- Missing payee or memo that hides a match
Tip for speed: match high-volume, low-variance items first. For example, payroll, rent, and debt service. These anchors help you spot what does not belong.
Step 3: Identify and Classify Differences
Now you explain what remains unmatched. Most items fall into timing or errors.
3.1 Timing Differences
Timing differences happen when you record activity in the books before the bank posts it.
Common timing differences:
- Outstanding checks (issued in books, not cleared at bank)
- Deposits in transit (recorded in books, not yet posted by bank)
- Pending bank transactions (bank initiated late in the period)
Timing items should roll forward. They should also clear within a reasonable window.
3.2 Errors
Errors need corrections. They do not roll forward as “normal.”
Possible errors:
- Bank errors (rare, but possible)
- Book errors, such as:
- Wrong amount
- Wrong date or period
- Wrong account (posted to another cash account)
- Missing entry or duplicate entry
Here is a practical rule I use. If an item stays outstanding for 60+ days, assume an error until proven otherwise.
Step 4: Post Bank-Only Items to the Books
Post items that appear on the statement but not in the books. This step often closes the gap fast.
Typical bank-only items to record:
- Bank service charges and fees
- Interest income
- NSF or returned payments
- Chargebacks
- Automatic loan payments
Rule: If it’s on the statement and not in the books, either:
- (a) Post it, or
- (b) Document why it should not be posted
For example, some debits relate to personal activity on a mixed-use account. You still document it and reclass it properly.
Step 5: Adjust and Prove the Reconciliation to $0.00
This is the proof step. You show how both sides reach the same adjusted number.
Use this template:
Adjusted bank balance
= statement ending balance
± deposits in transit
− outstanding checks
± bank corrections
Adjusted book balance
= GL cash balance
± book corrections and entries needed
Validate: Adjusted bank balance = Adjusted book balance.
If your difference equals a clean round number, look for a missing entry. If your difference equals an odd number, look for a transposition or partial posting.
Step 6: Lock the Period
Locking prevents post-recon changes. Changes after reconciliation cause most “why is cash off?” fire drills.
Do this:
- Freeze or lock the reconciled period if your system supports it.
- Require review for any edits to reconciled transactions.
Even in small teams, set a rule. One person approves any post-close cash change. Therefore, you protect the close.
Step 7: Save Supporting Documentation
Save support the same way every month. Make it easy for a reviewer to follow.
Required support to store:
- Statement PDF
- Reconciliation report
- Exception list (uncleared items)
- Journal entries posted (fees, interest, returns)
- Notes that explain unusual items
This also supports continuity. People take PTO. Clients go quiet. Your future self needs the trail.
Bank Reconciliation Steps
Use this as your standard checklist for how to do bank reconciliation month after month.
- Confirm statement period and account
- Tie prior month and starting point
- Match deposits
- Match withdrawals
- Identify timing differences (outstanding checks, deposits in transit)
- Identify and correct errors (wrong amount, duplicate, wrong account)
- Post bank-only items (fees, interest, NSF)
- Adjust and confirm difference = $0.00
- Save support and roll forward uncleared items
If your team struggles with consistency, put this checklist into your close tool. Then require sign-off.
Bank Reconciliation Example
This bank reconciliation example uses simple numbers. You can reuse the structure for any account.
Example Scenario (Use a Table in the Article)
Inputs:
- Statement ending balance: $25,000
- Book ending balance: $24,200
Reconciling items:
- Deposit in transit: +$1,500
- Outstanding checks: −$700
- Bank fee not recorded: −$100 (needs book entry)
- Customer payment returned NSF: −$500 (needs book entry / reclass)
Here is the walkthrough in a table.
Output:
- Adjusted bank: $25,000 + $1,500 − $700 = $25,800
- Adjusted books (before correction): $24,200 − $100 − $500 = $23,600
Now you need a $2,200 correction on the books. For example, a deposit got posted to the wrong bank account or wrong period.
After that correction:
- Adjusted books: $23,600 + $2,200 = $25,800
- Difference: $0.00
Unique real-world insight: most “random” differences come from one of two issues.
A deposit hit an undeposited funds account and never moved. Or a transfer posted on only one side.
Journal Entries to Include (Examples)
Use entries like these. Adjust accounts to match your chart of accounts.
- Bank fees:
- Debit Bank Fees Expense
- Credit Cash
- Interest earned:
- Debit Cash
- Credit Interest Income
- NSF returned payment:
- Debit Accounts Receivable (or a clearing account)
- Credit Cash
Common Bank Reconciliation Errors
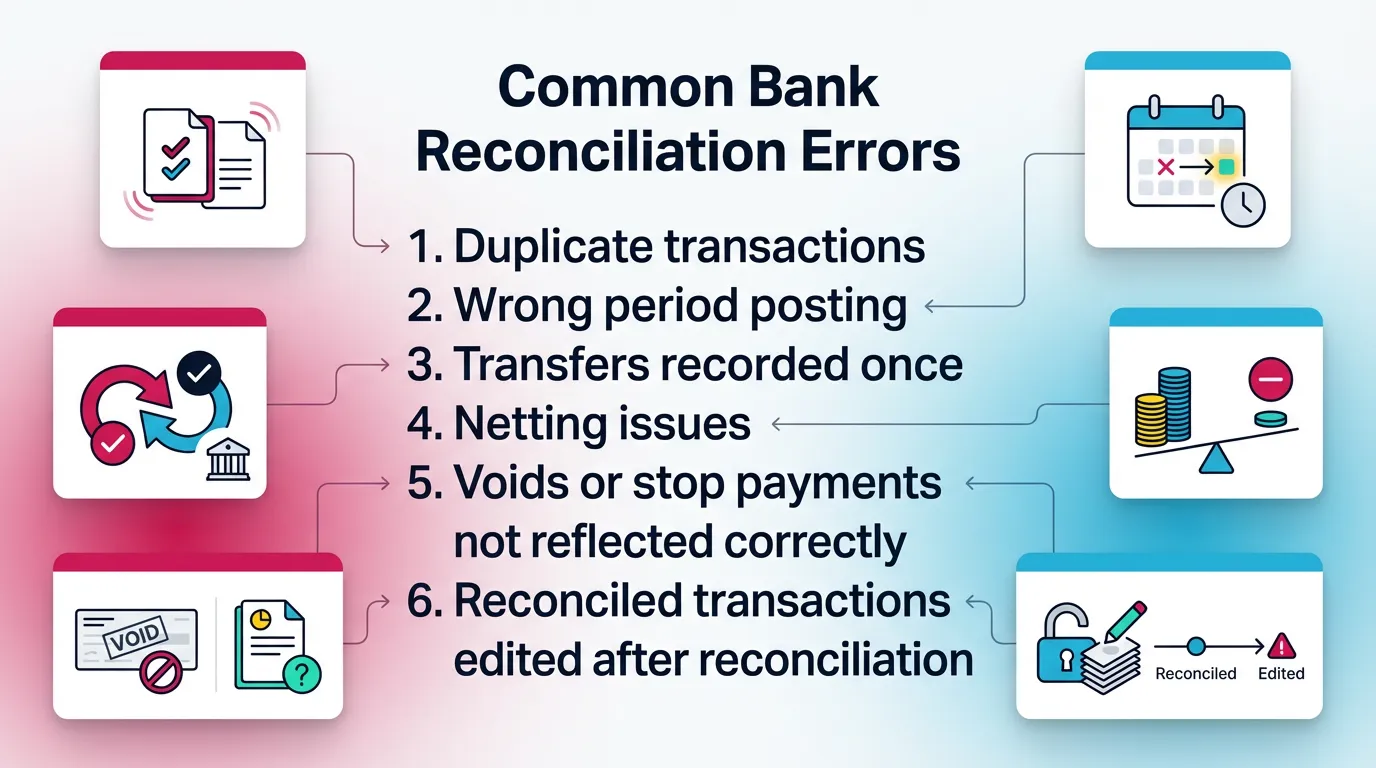
Most problems repeat. You can prevent them with a short set of controls.
Errors That Create “Phantom Differences”
These errors create differences that feel untraceable. However, they follow patterns.
- Duplicate transactions (bank feed + manual entry)
- Wrong period posting (month-end cutoff issues)
- Transfers recorded once (but hit two cash accounts)
- Netting issues with merchant deposits (fees withheld)
- Voids or stop payments not reflected correctly
- Reconciled transactions edited after reconciliation
If you see a difference that keeps changing, suspect edits after the fact. Pull an audit log from your accounting system if available.
Practical Troubleshooting Workflow
Use a repeatable path. Do not guess.
- Re-run match logic. Sort by amount. Scan for duplicates.
- Search for common amounts. Fees, payroll, and batch totals repeat.
- Check transpositions. For example, 540 vs 450.
- Confirm transfers hit the correct accounts on both sides.
- Verify cutoff. Look at last-day deposits and late-night ACH.
- If still stuck, rebuild from last reconciled point. Isolate the break date.
If you reconcile multiple entities, track which step caused the break. That note speeds up next month.
How to Reconcile in QuickBooks
You reconcile in QuickBooks by using the built-in Reconcile tool. You enter the statement date and ending balance. Then you clear transactions until the difference equals zero.
In QuickBooks Online: The Standard Reconcile Flow
- Navigate: Accounting / Bookkeeping → Reconcile
- Select the account and statement end date
- Enter ending balance and statement date
- Match and clear transactions and confirm difference
- Finish and generate the reconciliation report
This is the most common path people follow when searching how to reconcile in quickbooks.
Common QBO-Specific Gotchas
These issues show up often in QBO-led workflows.
- Bank feed rules creating duplicates
- Transactions “matched” in the feed but miscategorized
- Reconcile report vs register mismatch due to later edits
- Multiple users changing cleared status
If the reconcile screen shows $0.00 but your register later changes, suspect edits to cleared items. Lock the period if you can.
QBO Best Practice
Treat reconciliation as a review checkpoint, not a clerical task. Ask:
- Does this cash activity make sense?
- Do any payees look unfamiliar?
- Do any outstanding items look stale?
Best Practices for Monthly Bank Reconciliation
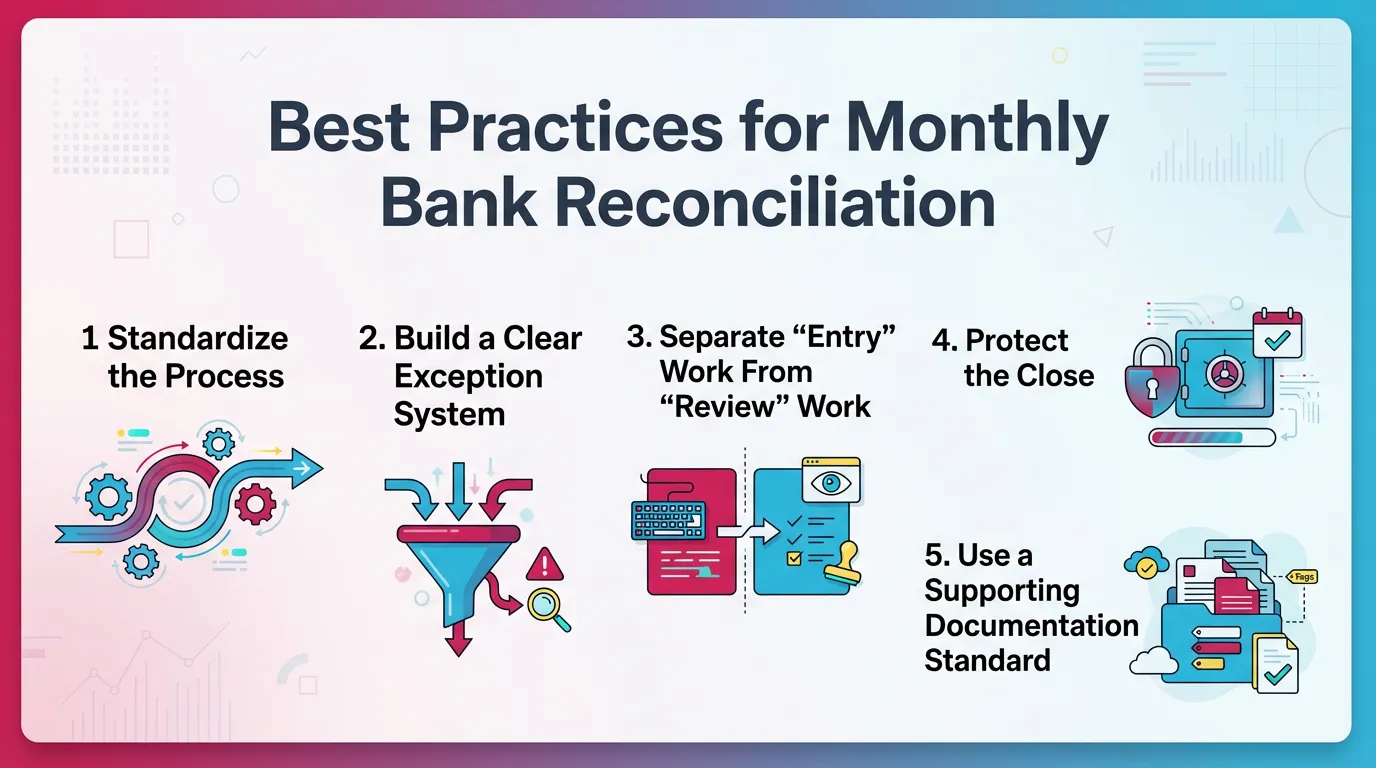
These practices scale across clients and entities. They also reduce close stress.
Standardize the Process
Standardization makes training easier. It also makes review faster.
- Use the same order every month: deposits → withdrawals → bank-only → exceptions
- Use consistent naming for payees, transfers, and batch IDs
Consistency helps you spot anomalies. Your eyes learn the pattern.
Build a Clear Exception System
Exceptions need structure. Otherwise, they turn into a graveyard list.
Maintain a roll-forward list:
- Outstanding checks by age
- Deposits in transit by date
Set thresholds for escalation. For example:
- 30 days: confirm status with AP or payroll
- 60 days: investigate error or stop payment
- 90 days: require written explanation and decision
Separate “Entry” Work From “Review” Work
Separation reduces risk. It also improves quality.
- One person prepares.
- Another person reviews material exceptions, when feasible.
Require notes for unusual items. Do not accept “cleared” as an explanation.
Protect the Close
Protecting the close prevents rework later.
- Lock periods after reconciliation where possible
- Limit who can edit reconciled transactions
Even a simple permission rule helps. Therefore, you avoid silent changes.
Use a Supporting Documentation Standard
Documentation should feel boring. That is the point.
- Use one folder structure per month, client, and account
- Save the same artifacts every time: statement, report, exceptions, JEs
This also supports handoffs. It helps when a reviewer jumps in mid-close.
How Xenett Helps Accounting Teams Operationalize Bank Reconciliation Controls
Bank reconciliation is one control. The real challenge is execution across periods, accounts, and people. Teams miss steps, skip review, or lose the exception trail.
Xenett helps by acting as an operational layer around your close. It does not provide audit services and it is not an audit tool. It supports consistent workflow, review, and documentation.
For related close workflows, see:
Review and Approval Workflows
You need a structured review. You also need it to focus on exceptions.
With Xenett, teams can:
- Route reconciliations for review and approval
- Require notes on aged items and unusual cash movements
- Keep the reviewer focused on findings, not redo work
This helps with repeated issues like:
- Aged outstanding checks
- Recurring feed duplicates
- Unexplained withdrawals
Close Task and Checklist Management
Most reconciliation problems come from missed prerequisites. For example, someone forgets to post fees or pull the statement.
With Xenett, teams can:
- Standardize recurring monthly steps
- Enforce dependencies across tasks
- Ensure the team posts bank-only items before final cash review
This makes the bank reconciliation process repeatable.
Visibility Into Close Status and Bottlenecks
You cannot manage what you cannot see. Spreadsheets hide delays.
Xenett gives teams visibility into:
- Which entities or clients still need reconciliation
- Which accounts show exceptions that remain unresolved
- Which close items wait on missing statements or unclear transactions
Therefore, controllers can remove blockers early.
FAQ: Bank Reconciliation Questions
How do you reconcile a bank statement?
Compare statement transactions to your books, record bank-only items and correct errors, track timing differences like outstanding checks and deposits in transit, then confirm the adjusted balances match.
Save the statement and reconciliation report for support.
What are the steps in bank reconciliation?
Confirm balances, match deposits and withdrawals, identify timing differences and errors, post bank-only entries (fees, interest, returns), and prove the reconciliation to a $0 difference with saved support.
These bank reconciliation steps work for any accounting system.
What are common bank reconciliation errors?
Duplicates, wrong period postings, missing transfers, net deposit and merchant fee confusion, uncleared items not rolled forward, and edits to reconciled transactions after completion.
Most errors repeat, so standardize your checks.
How often should you do a bank reconciliation?
Do it at least monthly for each bank account.
High-volume or higher-risk accounts often need weekly reconciliation to catch issues earlier.
What is a bank reconciliation example of a timing difference?
An outstanding check recorded in the books but not yet cleared by the bank.
A month-end deposit recorded in the books that posts at the bank in the next period also counts.
How do you reconcile in QuickBooks Online?
Use the Reconcile tool, enter the statement ending balance and date, clear matched transactions, resolve missing items like fees, interest, and NSF, and finish when the difference equals zero.
Then save the reconciliation report.
What do you do if your bank reconciliation won’t balance?
Check duplicates, wrong amounts, and cutoff timing first.
Confirm transfers posted in both accounts. Then rebuild from the last known good point and isolate the break by date and amount.
Conclusion
How to Reconcile a Bank Statement stays simple when you run the same process every time. Match deposits and withdrawals. Classify differences. Post bank-only items. Prove to $0.00. Then lock and save support.
If you want this to run smoothly across every account and period, build it into your close workflow. Assign owners, require review on exceptions, and track roll-forwards. That is where Xenett fits naturally in modern close execution.


.jpg)