.svg)

Detailed Quickbooks Self Employed Accounting Software Guide

This blog is for you...
If you’re overwhelmed by managing your business finances.
OR
If you're struggling to keep your personal and business expenses separate.
OR
If tax time in the United States always seems to catch you off guard.
Every freelancer, sole proprietor, and independent contractor wants to manage their finances efficiently.
You, me, everyone.
But there is a significant challenge that many face: staying on top of financial management without dedicating too much time and effort.
Yes, I know you might be using spreadsheets or manual methods, but so do many others.
So, how do you get ahead?
That’s where QuickBooks Self-Employed comes in.
It’s a powerful accounting solution from Intuit designed specifically for freelancers and self-employed individuals in the US.
It helps you track income and expenses seamlessly, keep business and personal finances separate, and prepare for self-employment tax with less stress.
I see what you’re thinking: “Yet another accounting software with the same old promises.”
Let me explain why this blog is different:
In this guide, I’m sharing practical insights and strategies that have helped countless US-based freelancers and solopreneurs streamline their financial management and focus more on their work.
You don’t need to start from scratch – you can easily implement these tips to enhance your business operations.
I’ll show you exactly how to use QuickBooks for self-employment to take control of your finances:
🌟 We’ll start by understanding what QuickBooks Self-Employed.
🌟 Then, we'll explore the key features and benefits of QuickBooks Self-Employed.
🌟 After that, we'll look into how tools like Xenett can enhance your experience by providing advanced analytics.
🌟 I'll also guide you through the process of setting up your QuickBooks Self-Employed account and connecting your bank accounts and credit cards.
🌟 Finally, we'll discuss the advanced features and reporting tools to help you make informed financial decisions.
So, without wasting any time, let’s dive into the details.
What is QuickBooks Self-Employed?
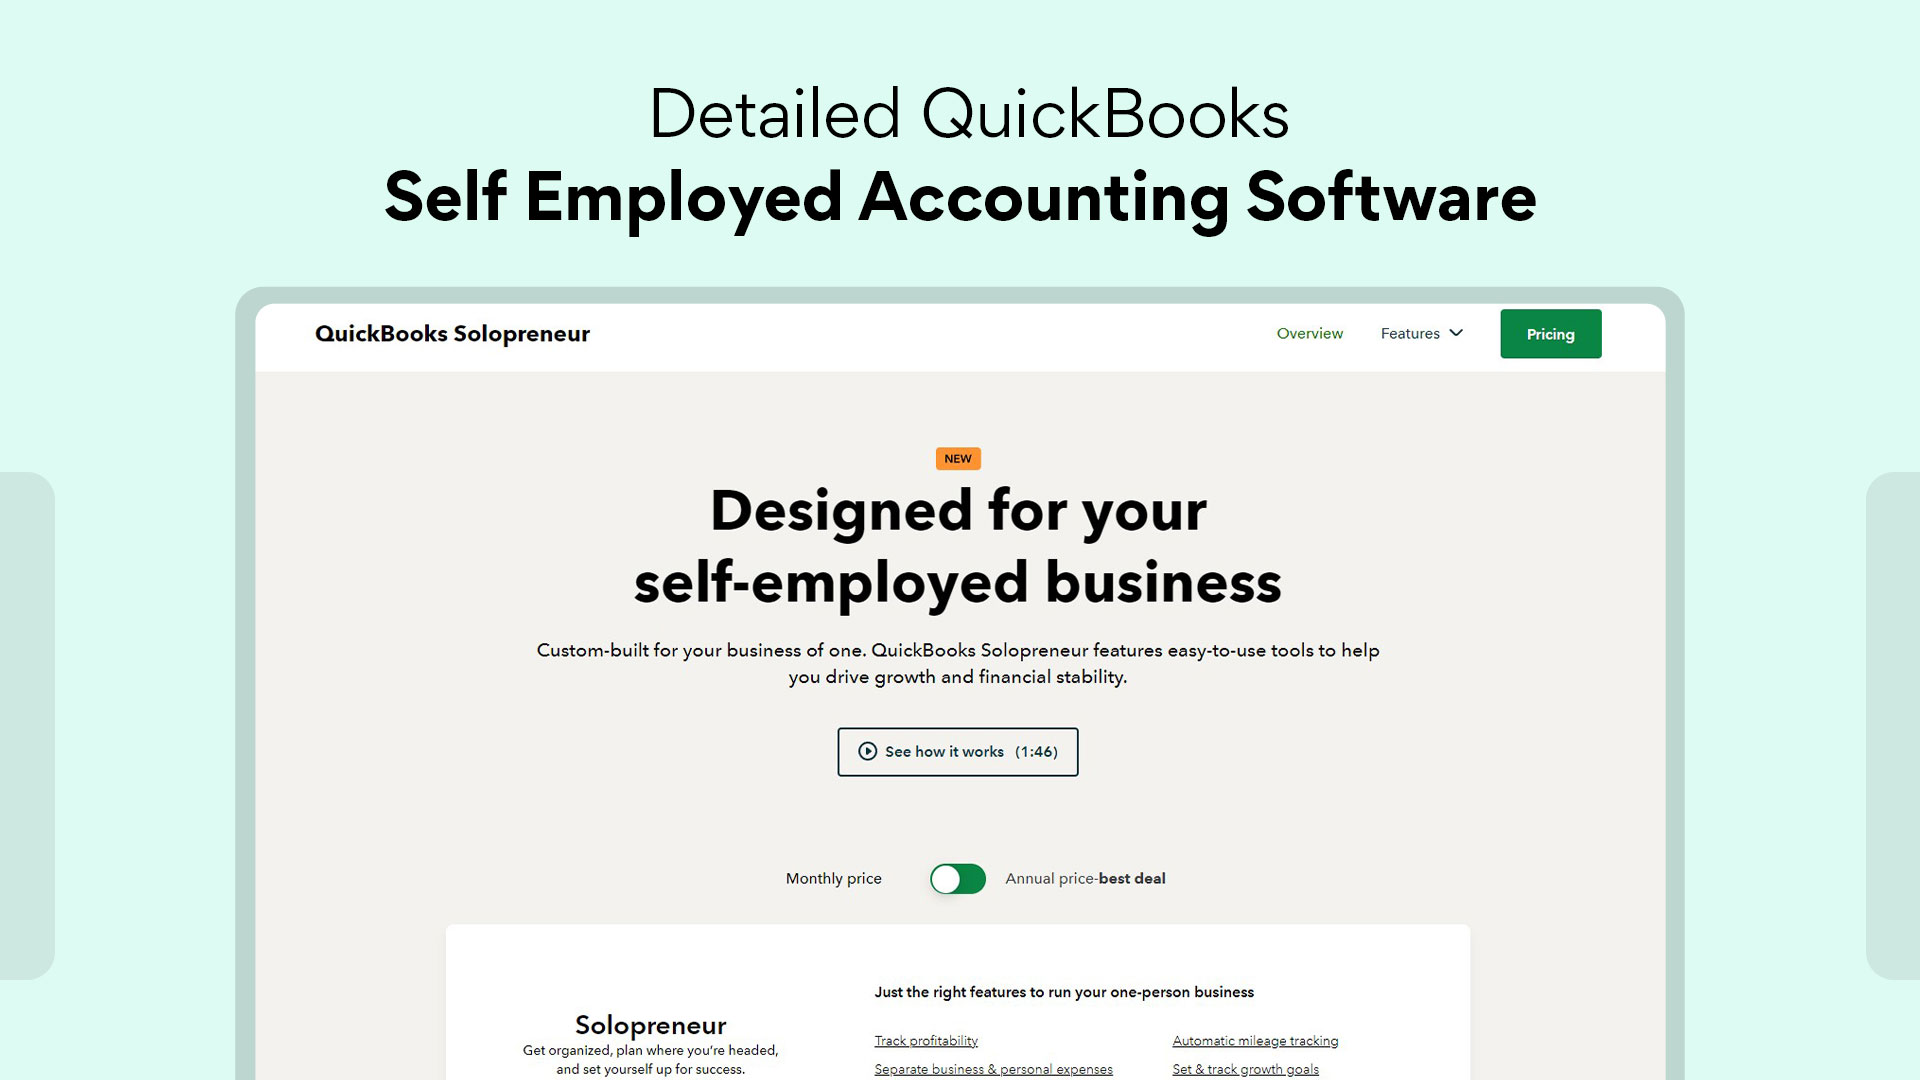
QuickBooks Self-Employed (sometimes also referred to as QuickBooks Solopreneur) is an accounting software designed to help self-employed professionals manage their money with ease.
If you work for yourself...whether as a freelancer, sole proprietor, or independent contractor in the United States...this tool is built with your needs in mind.
Created by Intuit, QuickBooks for self-employment allows you to track your income, expenses, and cash flow in one place without the hassle of spreadsheets. By connecting your bank accounts and credit cards, you can keep personal and business finances separate and stay organized throughout the year.
Additionally, tools like Xenett complement QuickBooks Self-Employed by offering advanced analytics, customizable financial reports, and automated reconciliation features that go beyond the basics. With Xenett, you can:
- Access more detailed analytics to understand financial trends.
- Generate customizable reports for better insights into your business performance.
- Automate reconciliation to reduce errors and save time.
- Get advanced tax summaries that simplify self-employment tax QuickBooks preparation.
- Make smarter financial decisions with in-depth data insights.
Why is QuickBooks Self-Employed Good for Freelancers, Solopreneurs, and Independent Contractors?

1. Easy to Use
QuickBooks Self-Employed has a simple design and mobile app that anyone can use, no accounting degree required. The interface is intuitive, so you spend less time figuring out your finances and more time growing your business.
2. Keep Personal and Business Finances Separate
You can connect your business credit cards and bank accounts directly to QuickBooks, making it easy to separate business and personal spending. This separation helps you see your business’s true financial health and avoids confusion at tax time.
3. Track Your Expenses Easily
QuickBooks Self-Employed makes expense tracking effortless. You can categorize expenses, like travel, supplies, or marketing, so you never miss deductions. This feature is especially valuable for US-based freelancers looking to maximize tax savings.
4. Invoice Your Clients
With QuickBooks Self-Employed, you can create and send professional invoices quickly. It keeps track of payments, showing who has paid and who hasn’t, giving you a clear picture of your cash flow.
5. Track Mileage Automatically
For independent contractors who drive for work, QuickBooks offers mileage tracking through its mobile app. This ensures every mile is logged for potential tax deductions, saving both time and money.
6. Prepare for Taxes
One of the biggest benefits of QuickBooks Self-Employed is stress-free tax preparation. The software organizes all your financial data, estimates quarterly taxes, and helps you stay ready for tax season. With self-employment tax QuickBooks features, you won’t be caught off guard.
How to Get Started with QuickBooks Self-Employed
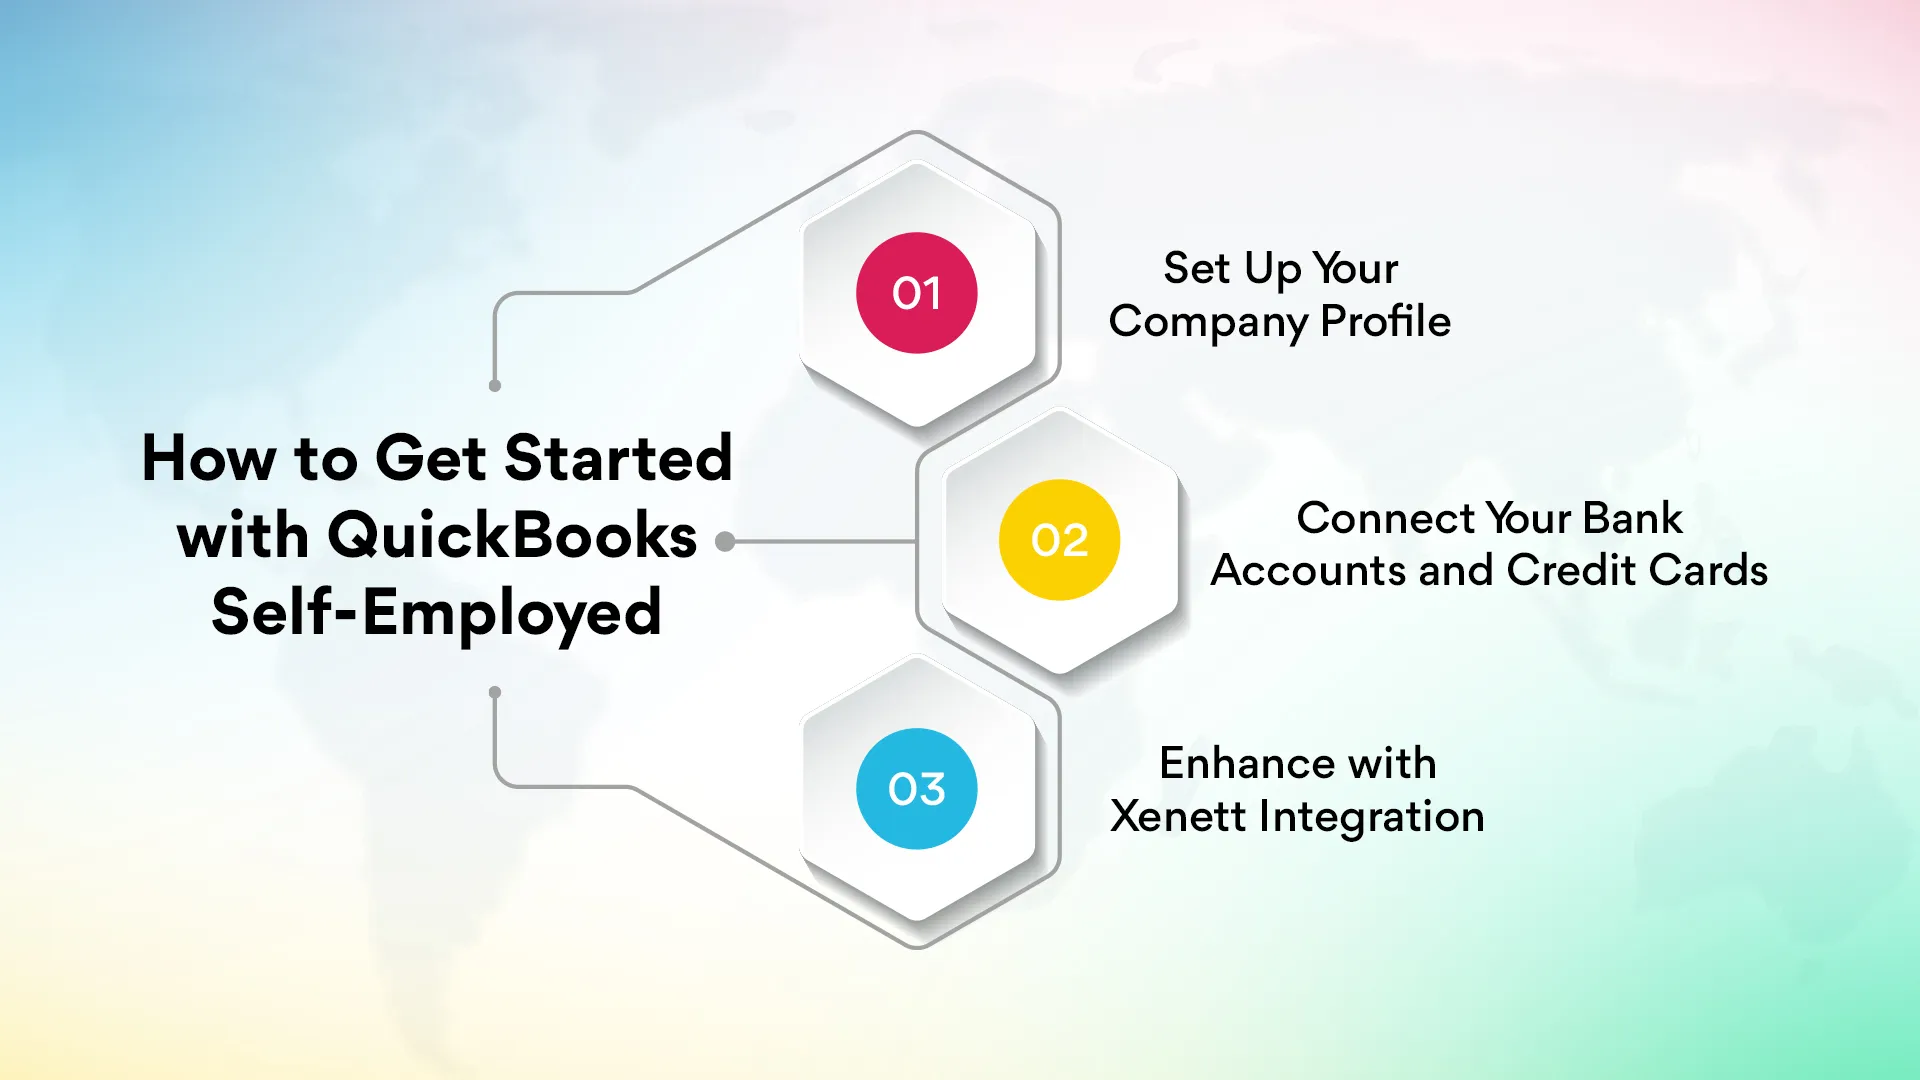
Setting up QuickBooks Self-Employed is simple and only takes a few minutes. Whether you’re a freelancer in the United States, a sole proprietor, or an independent contractor, following these steps will help you get your accounting software running smoothly.
Step 1: Set Up Your Company Profile
Your company profile is the foundation of your QuickBooks account. By entering accurate details, you ensure that your financial management and reporting are tailored to your business.
Sign Up or Log In
- Visit the QuickBooks Self-Employed website or download the mobile app.
- If you already have an Intuit account, you can log in with those credentials.
Enter Your Business Details
- Business Name: Add the official name of your business.
- Business Address: Enter the US address where your business is located.
- Contact Information: Provide a phone number and email address.
Tax Information
- Business Type: Choose your structure (sole proprietor, LLC, or other).
- Tax ID Number (EIN or SSN): Enter this if you have one. QuickBooks uses it to help estimate your self-employment tax obligations.
✅ Save Your Information
Once everything is entered, save your profile. QuickBooks will begin organizing your income, expenses, and cash flow so you can manage finances with less effort.
Step 2: Connect Your Bank Accounts and Credit Cards
For accurate tracking, link your business bank accounts and credit cards to QuickBooks Self-Employed. This ensures all transactions are automatically imported and categorized, saving time and minimizing manual errors.
Step 3: Enhance with Xenett Integration
After setting up your QuickBooks profile, integrating Xenett can take your reporting to the next level.
With Xenett, you can:
- Generate advanced financial reports for deeper insights.
- Track performance metrics and identify growth opportunities.
- Automate reconciliation for more accurate books.
- Simplify tax preparation with detailed summaries, especially useful during quarterly tax filings in the US.
This integration gives freelancers and small business owners a stronger handle on their financial management, helping them make smarter, data-driven decisions.
How to Connect Bank Accounts and Credit Cards
One of the most important steps in setting up QuickBooks Self-Employed or QuickBooks Solopreneur is connecting your bank accounts and credit cards. This ensures the software automatically tracks your income, expenses, and cash flow, saving you hours of manual work.
You can do this both in the QuickBooks Online platform or the mobile app, whichever is more convenient.
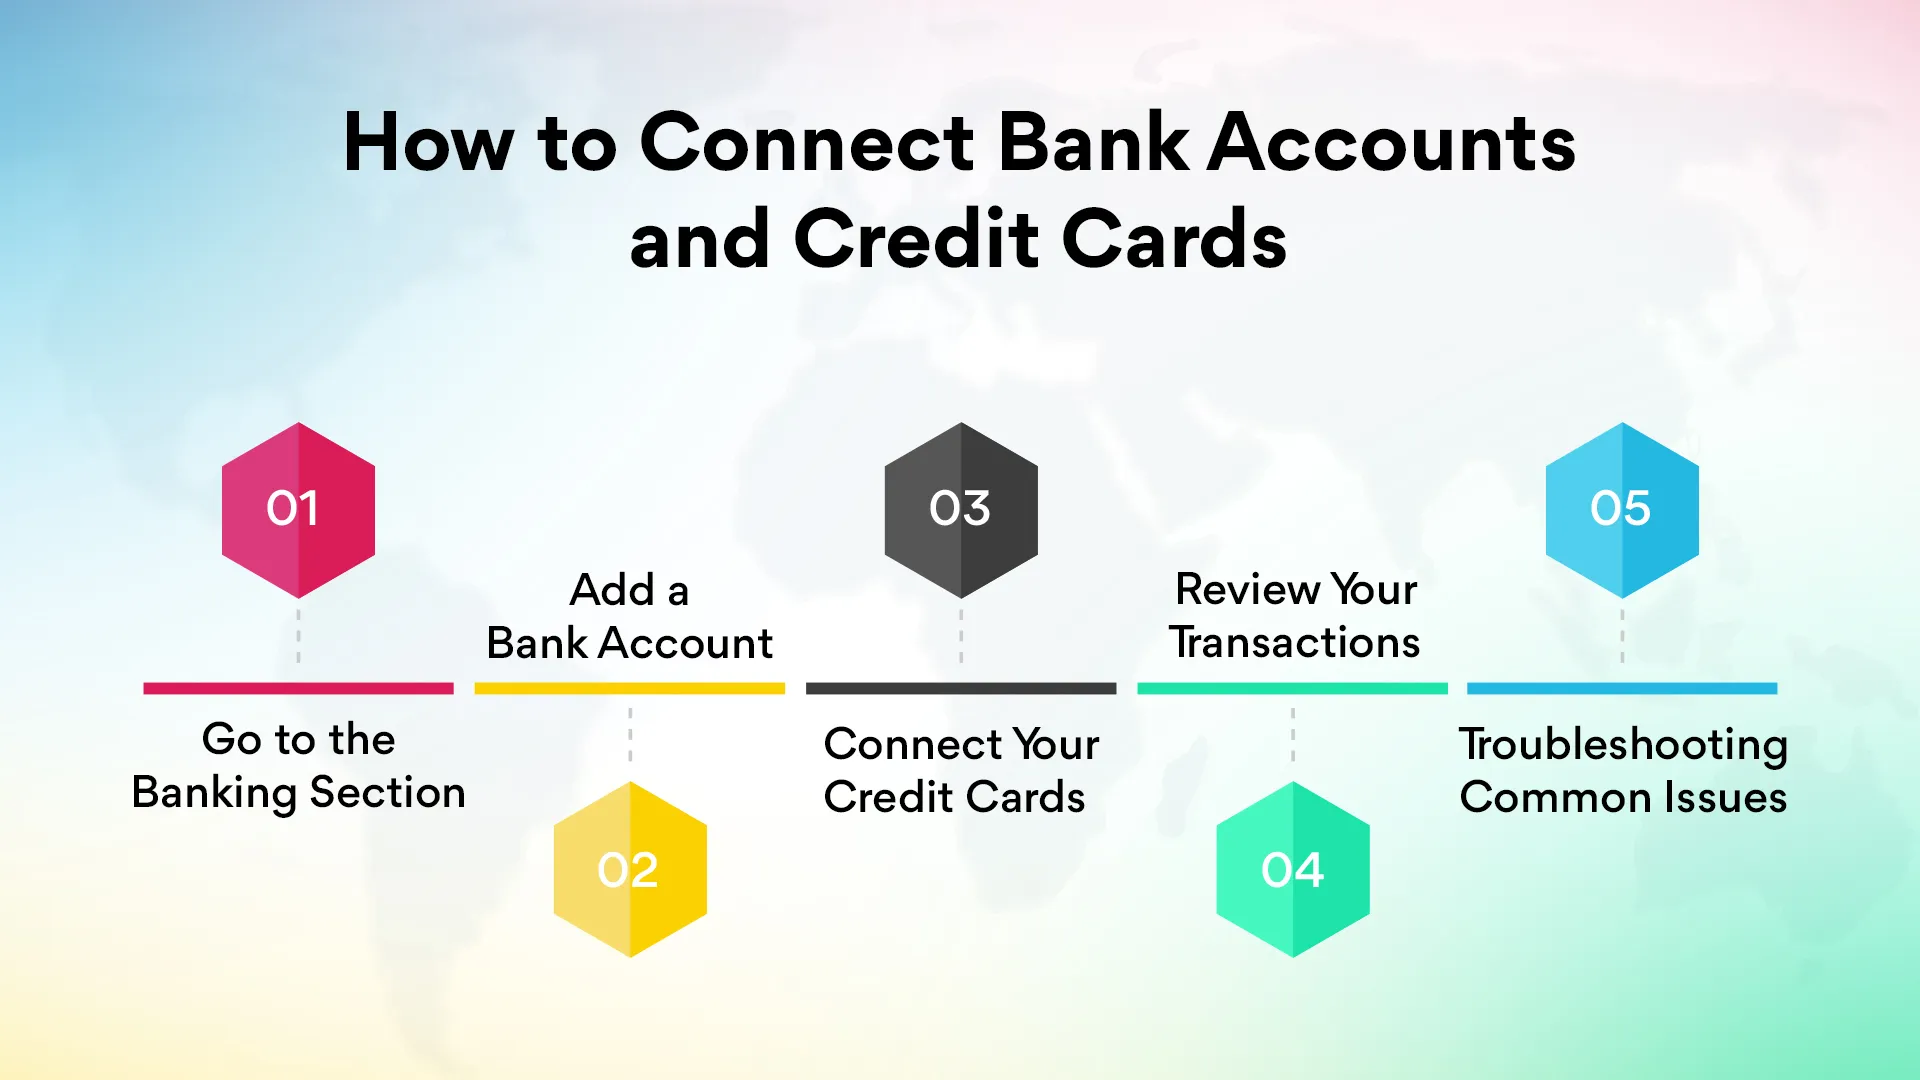
Step 1: Go to the Banking Section
- Once logged in, navigate to the “Banking” tab. This is where you can connect all your business financial accounts.
Step 2: Add a Bank Account
- Click “Add Account” and select your bank from the list. If your bank isn’t listed, use the search bar to find it.
- Sign in with your online banking credentials (the same username and password you normally use). QuickBooks securely encrypts the connection to link with your bank.
Step 3: Connect Your Credit Cards
- Repeat the same process to add your business credit cards.
- Once connected, transactions from your credit card will automatically sync with QuickBooks.
Step 4: Review Your Transactions
- Automatic Downloads: QuickBooks imports the last 90 days of transactions from your bank accounts and credit cards.
- Categorize Transactions: Expenses are automatically suggested into categories (like “Travel” or “Supplies”), but you can reassign them if needed.
- Set Up Bank Rules: For recurring charges (like monthly subscriptions), you can create rules so transactions are categorized correctly every time.
Step 5: Troubleshooting Common Issues
- Account Not Connecting: Double-check your bank login details or try again later.
- Duplicate Transactions: Exclude duplicates if they appear.
- Old Transactions Missing: Since QuickBooks typically downloads 90 days of history, add older ones manually if required.
Why This Step Matters for US Freelancers
For freelancers, independent contractors, and sole proprietors in the United States, having your bank accounts and credit cards connected is crucial. It not only simplifies bookkeeping but also makes mileage tracking and tax deductions more accurate.
Whether you use QuickBooks Self-Employed, QuickBooks Online, or QuickBooks Solopreneur, this integration helps you maintain clear records, stay audit-ready, and save time on financial management.
How to Manage Transactions in QuickBooks Self-Employed
Managing your transactions in QuickBooks Self-Employed is straightforward once you get familiar with the system. Whether you’re using the mobile app, QuickBooks Online, or QuickBooks Solopreneur, these tools simplify financial management for freelancers and small businesses in the United States.
How to Manually Add Transactions
Sometimes, certain transactions don’t automatically import from your bank accounts or credit cards, so you’ll need to add them manually:
- Go to the Transactions Section – Log in and navigate to “Transactions.”
- Click on “Add Transaction” – Select the button to create a new entry.
- Enter Transaction Details:
- Date: Pick the transaction date.
- Description: Add a short note about the transaction.
- Amount: Enter the total amount.
- Category: Choose the right expense or income category (like “Supplies” or “Travel”).
- Save the Transaction – Confirm details and save it to your records.
How to Review and Categorize Transactions
QuickBooks Self-Employed helps ensure your records are accurate:
- Go to the Transactions Section – Open your list of imported transactions.
- Review Unreviewed Transactions – Look for those marked as “Unreviewed.”
- Check Details – Verify the date, amount, and description.
- Categorize Transactions – QuickBooks will suggest a category, but you can adjust it.
- Add Notes (Optional) – Useful for keeping extra context.
- Save Changes – Update your records with one click.
This process not only keeps your books accurate but also improves your readiness for self-employment tax deductions in the US.
Advanced Features for Smarter Financial Management
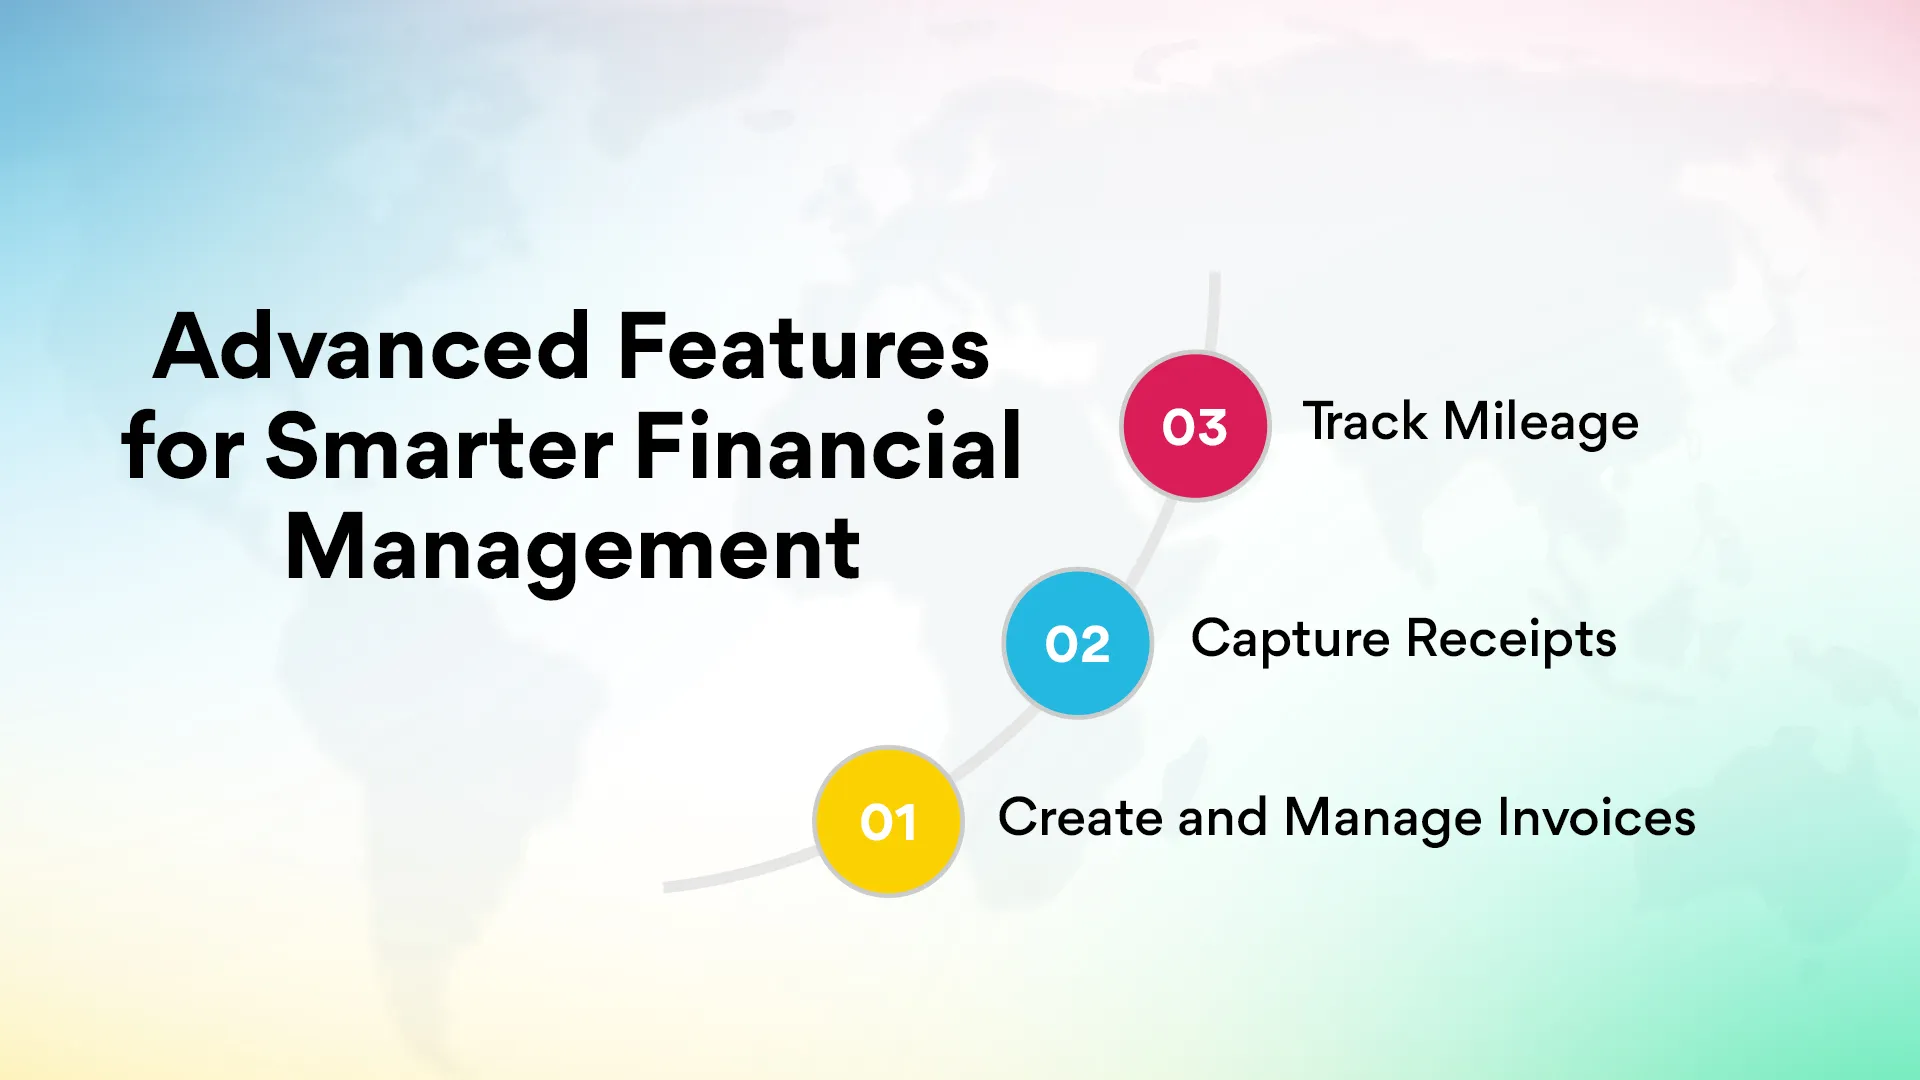
Beyond simple transaction tracking, QuickBooks Self-Employed offers advanced tools that make financial management easier:
1. Create and Manage Invoices
- Go to the Invoices Section – Click “Create Invoice.”
- Add Client & Invoice Details – Include date, due date, services, and prices.
- Send Directly to Clients – Email invoices directly from QuickBooks.
- Manage Invoices – Track which are paid, unpaid, or overdue. Send reminders when needed.
2. Capture Receipts
- Snap photos of physical receipts with the QuickBooks mobile app.
- The system will automatically match receipts to transactions.
3. Track Mileage
- With built-in mileage tracking, QuickBooks records trips automatically using GPS.
- This feature helps US-based freelancers and contractors maximize tax deductions without manual logs.
Why This Matters for Freelancers and Solopreneurs
For US freelancers, independent contractors, and small business owners, managing transactions in QuickBooks Online, QuickBooks Self-Employed, or QuickBooks Solopreneur ensures you always know where your money is going. From invoices to mileage tracking, the software simplifies every part of financial management so you can spend more time on your work and less on bookkeeping.
How to Capture Physical Receipts in QuickBooks Self-Employed
Keeping track of receipts is essential for managing expenses and preparing for taxes. With QuickBooks Self-Employed, you can digitize your paper receipts and keep them organized in one place. This feature, available both in the mobile app and through QuickBooks Online, ensures freelancers and solopreneurs in the US never lose important records.
Steps to Capture Receipts:
- Go to the Receipts Section – From your QuickBooks dashboard, open the “Receipts” tab.
- Take a Photo or Upload – Snap a photo of your receipt using your smartphone or upload an existing picture.
- Match to a Transaction – QuickBooks will automatically match the receipt to an existing expense. If no match is found, you can enter the details manually.
- Save and Store Securely – Once uploaded, the receipt is stored digitally, making it easy to access during audits or tax preparation.
This seamless workflow shows why QuickBooks is considered an effective accounting solution for US-based freelancers and independent contractors.
How to Track Business Mileage
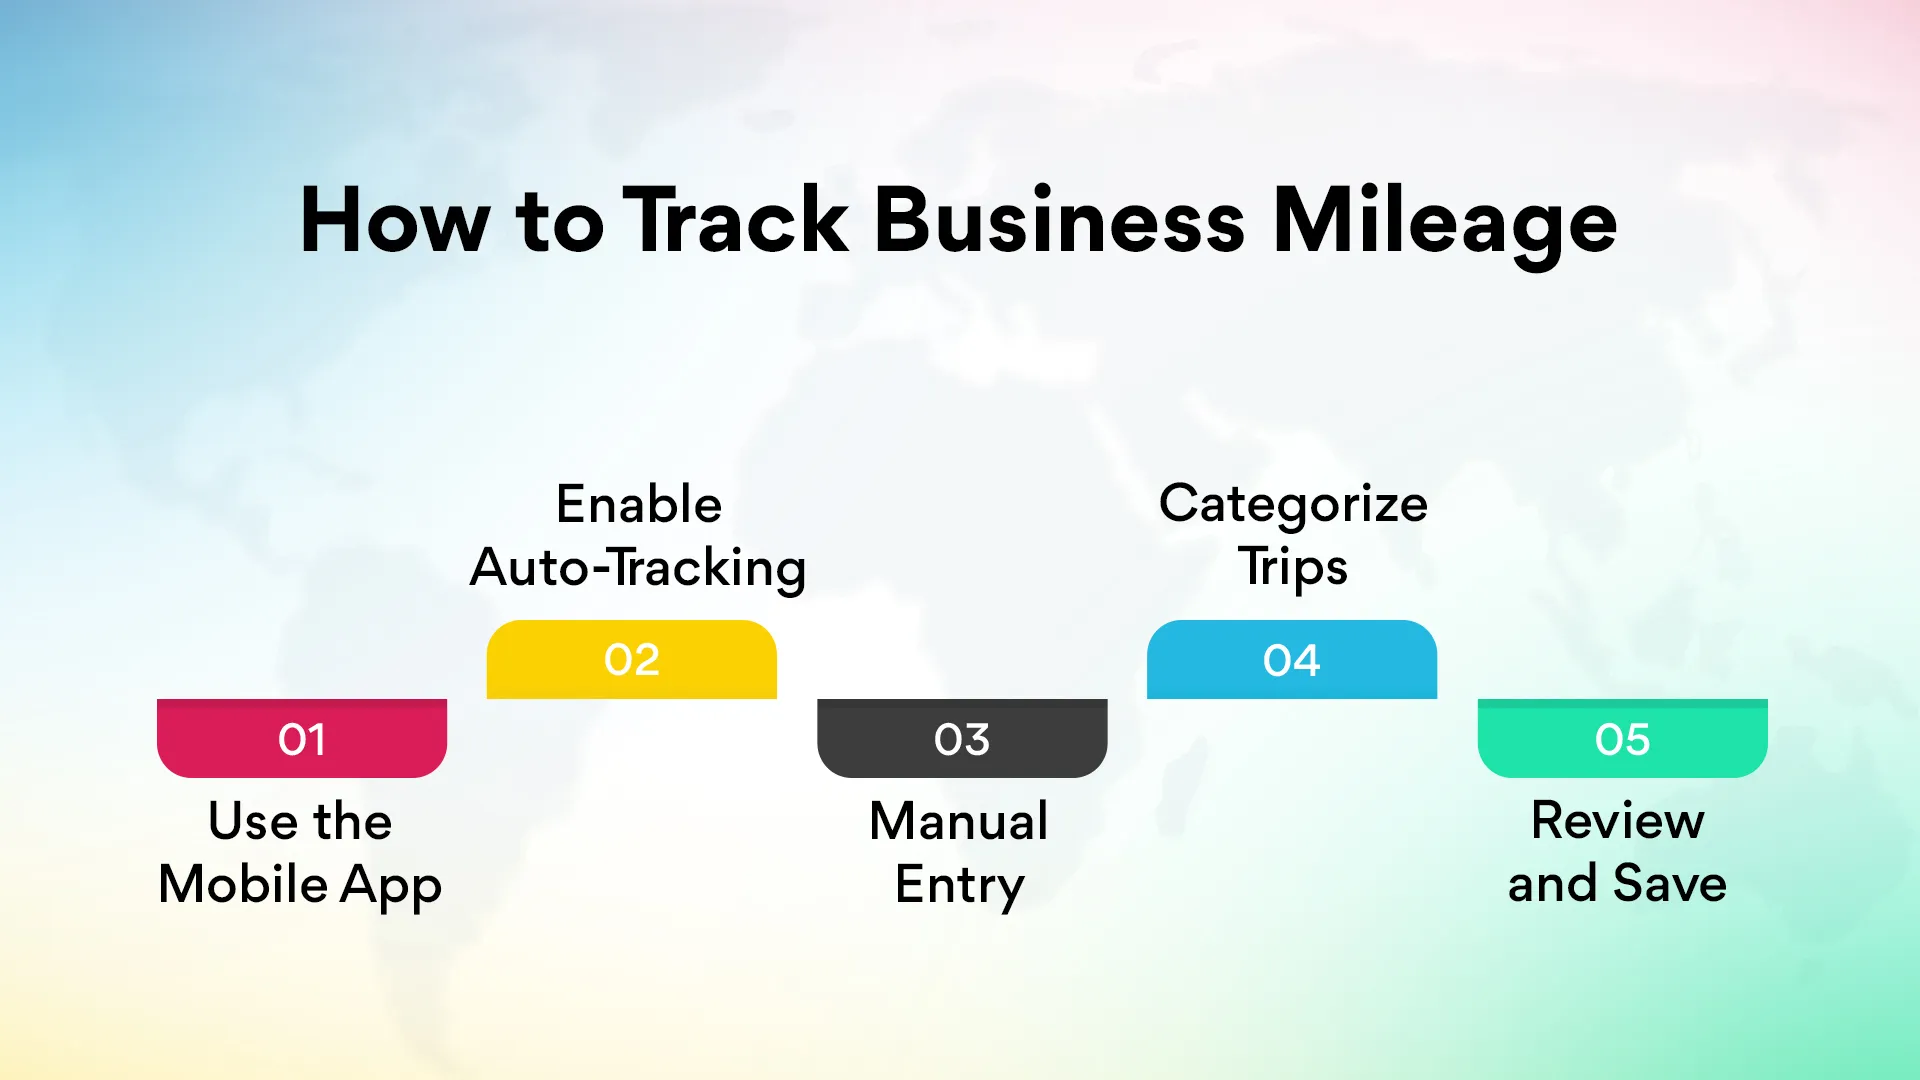
If you drive for work, mileage tracking is one of the easiest ways to claim tax deductions. QuickBooks Self-Employed makes this process effortless with GPS-enabled tracking:
- Use the Mobile App – Download the app and head to the “Mileage” section.
- Enable Auto-Tracking – Turn on GPS-based automatic trip tracking.
- Manual Entry – Prefer manual input? Select “Add Trip” and fill in details.
- Categorize Trips – Mark each trip as business or personal.
- Review and Save – Confirm accuracy and save for future reporting.
This automated mileage tracking helps solopreneurs maximize deductions without juggling paper logs.
How to Handle Reporting and Tax Preparation
Staying on top of financial data is crucial for solopreneurs, freelancers, and small business owners in the US. That’s where QuickBooks Online and QuickBooks Solopreneur shine. Both platforms make it easy to run detailed business reports and get ready for tax season.
Steps to Run Business Reports:
- Go to the Reports Section – From your QuickBooks account, open “Reports.”
- Choose a Report Type:
- Profit and Loss Report – Shows income vs. expenses for clear profit tracking.
- Expense Report – Breaks down spending by categories like travel, supplies, or software.
- Mileage Log – Summarizes business trips and total deductible mileage.
- Customize the Report – Select date ranges and categories relevant to your business.
- Generate the Report – Click “Run Report” to view real-time data.
- Save or Print – Store as PDF or print copies for tax documentation.
These tools not only simplify bookkeeping but also strengthen your financial management strategy by giving you visibility into business performance.
How to Prepare for Tax Time in QuickBooks Self-Employed
Preparing for tax season often feels overwhelming, but QuickBooks Self-Employed makes the process much more manageable. From organizing receipts to filing your return, it provides everything you need to stay on track with self-employment tax in QuickBooks.
Organize Your Transactions
- Review and Categorize: Double-check that all transactions are correctly reviewed and categorized. This ensures your tax data stays accurate.
- Match Receipts: Attach receipts to the right expenses for a clean audit trail.
Track Your Deductions
- Business Expenses: Record and categorize all deductible business expenses. QuickBooks highlights what you can write off to reduce your taxable income.
- Mileage Tracking: If you’ve logged mileage through the mobile app, verify that all business trips are recorded and ready for deductions.
Use Tax Reports
- Tax Summary Report: Quickly view your income, deductions, and estimated tax liability.
- Tax Details Report: Get in-depth insights into each transaction, helpful for clarifications with tax authorities.
Estimate Quarterly Taxes
- Quarterly Tax Calculator: Avoid surprises by using QuickBooks to estimate how much you owe each quarter.
- Set Aside Funds: Allocate money for tax payments ahead of deadlines for smoother financial management.
File Your Taxes
- Export Data: Share your data easily with your accountant or import it into filing software.
- TurboTax Integration: With seamless integration, filing becomes even faster.
QuickBooks also connects with QuickBooks Payments to keep your income records updated in real time, which helps sole proprietors and QuickBooks Solopreneur users maintain accurate books for tax season. Combined with QuickBooks Online, you get an all-in-one accounting solution for hassle-free compliance and tax readiness.
What Are the QuickBooks Self-Employed Plans and Pricing?
When it comes to affordability and value, QuickBooks Solopreneur keeps things simple. This plan is designed specifically for freelancers, independent contractors, and small business owners who want easy financial management without overcomplicating things. With its built-in features, from tracking mileage to sending invoices, it’s a complete tool for staying on top of your business finances.
Key Features You Get with QuickBooks Solopreneur:
- Track your profit and business performance in real time
- Automatically log and categorize mileage
- Separate business and personal expenses with ease
- Create and customize estimates and invoices
- Accept payments quickly and securely with QuickBooks Payments
- Set goals and track your financial progress
- Monitor sales and sales tax
- Open a business bank account and earn 5.00% APY on savings
- Access everything through a simple, intuitive mobile app
- Get expert support for tax preparation
Pricing Options
Monthly Plan
- Regular Price: $20/month
- Summer Special: $6/month for the first 3 months (a 70% discount!)
Annual Plan
- Save 50% off the annual list price for the first year when you choose the annual subscription.
Special Offers
- Summer Savings: 70% off for the first 3 months (only $6/month). Offer valid until July 29th.
- Free 30-Day Trial: Try QuickBooks Solopreneur risk-free for 30 days. After the trial, the regular monthly fee applies unless you cancel.
Important Details to Keep in Mind
- Free Trial: First 30 days are free. After that, a credit card is required, and standard monthly pricing will apply.
- Discounted Monthly Plan: The 70% discount applies for the first 3 months only, after which the regular price of $20/month will resume. Offer available for new QuickBooks customers.
- Annual Plan Savings: Get 50% off for the first year; standard annual pricing will apply after renewal.
Whether you want to test it out with a free trial or lock in savings with an annual plan, QuickBooks Solopreneur makes managing your business simple, affordable, and effective.
Quick Comparison: Self-Employed vs. Solopreneur
Is QuickBooks Self-Employed Still Worth It in 2025?
Absolutely, QuickBooks Self-Employed continues to be a valuable tool for freelancers, solopreneurs, and independent contractors in 2025.
Here’s why it’s still relevant:
- If you’re just starting out, the basic features of QuickBooks Self-Employed are more than sufficient.
- You can easily track your income, expenses, and mileage.
- You can keep personal and business finances separate.
- You can prepare for sales tax and year-end filing with less hassle.
However, there are a few limitations to keep in mind:
- You won’t get in-depth financial analytics with QuickBooks alone.
- You won’t have fully customizable reports without additional tools.
- You won’t automate all financial processes, especially if you need more than the standard tax bundle features.
This is where tools like Xenett complement QuickBooks Self-Employed:
- They provide advanced data insights for smarter financial decision-making.
- They generate more comprehensive and customizable reports.
- They automate the reconciliation process, ensuring accuracy and saving time.
And the best part? The added efficiency means you can focus more on growing your business and less on financial stress.
✅ Yes, you read that right. Using QuickBooks Self-Employed, possibly with Xenett, can transform how you manage your business finances in 2025.
Ready to take your financial management to the next level in the US? Try Xenett today and see how it enhances your QuickBooks Self-Employed experience.
That’s all for today.
Happy managing your finances with QuickBooks Self-Employed!