.svg)


Closing the books at the end of the year is an essential task for any business using QuickBooks. This is the time when the account team reviews the financial data of the previous year. As they say, accurate financial statements are essential strategic tools for any business; it becomes important to close the books with no errors.
Generally, it takes a lot of time and effort for the account team to close the books in QuickBooks without errors during the busy year-end close. It can be hectic and challenging for businesses to accomplish year-end close. However, if you know how to do it smartly, there is minimum space for challenges. In this blog, we will walk you through the modern way to accomplish year-end close in Quickbooks so your account team can quickly and effortlessly finish this task and get ready for the next fiscal year.
What does it mean to close the books in QuickBooks?
Before we dive into the guide to closing the books in QuickBooks, let’s understand what it means to close the books in QuickBooks. When you set year-end in Intuit QuickBooks, it automatically zeroes out the income and expense accounts and transfers the balance of net income to retained earnings. So, it seems like your books are closed, but this is not the formal way. It is just a bookkeeping reset, which is alterable.
Simply put, anyone with access to your QuickBooks account can change something in the previous year or month's financial data, and you might not find out until the next fiscal year. Closing the books formally cements your numbers in QuickBooks. Once done, anyone who attempts to make changes to your QuickBooks accounts payable or any other account will receive a warning.
How do you do closing entries in QuickBooks?
During the year-end close, when you formally close the books, QuickBooks makes closing entries automatically. There are no actual transactions for Closing entries. When you look at the account information of Retained Earnings, you'll find each Closing Entry with the date and the balance of net income transferred to Retained Earnings. This is why bookkeepers oftentimes avoid a formal year-end or month-end closing in QuickBooks. However, to complete a thorough closing of your books, you must set a standard close process. Here, we have mentioned a step-by-step guide to close the books in QuickBooks.
Steps to close the books in QuickBooks
Whether you close the books at the end of the month or the end of the year, the process is the same when you close the books using QuickBooks. Follow the steps mentioned below to finish your book-closing work with high accuracy.
Step 1: Review your books
While reviewing your accounts, you may find it challenging to detect errors in your books. Manually finding errors in your books can be a daunting task; however, here, you can make a smart move to tackle this. Download the Xenett extension. It is a Chrome browser extension that can be very helpful for the accounting professionals like you. Book a demo call to learn more about it.
With this Chrome browser extension, Xenett will start working inside your QuickBooks account. If you are unaware of Xenett, it is an intelligent review and close tool that can autodetect errors in your books and help you close faster than earlier. Back to the point, once you are done with the subscription and extension setup, Here is a step-by-step guide on how to get started.
- Sign in to your QuickBooks online as a primary or company admin.
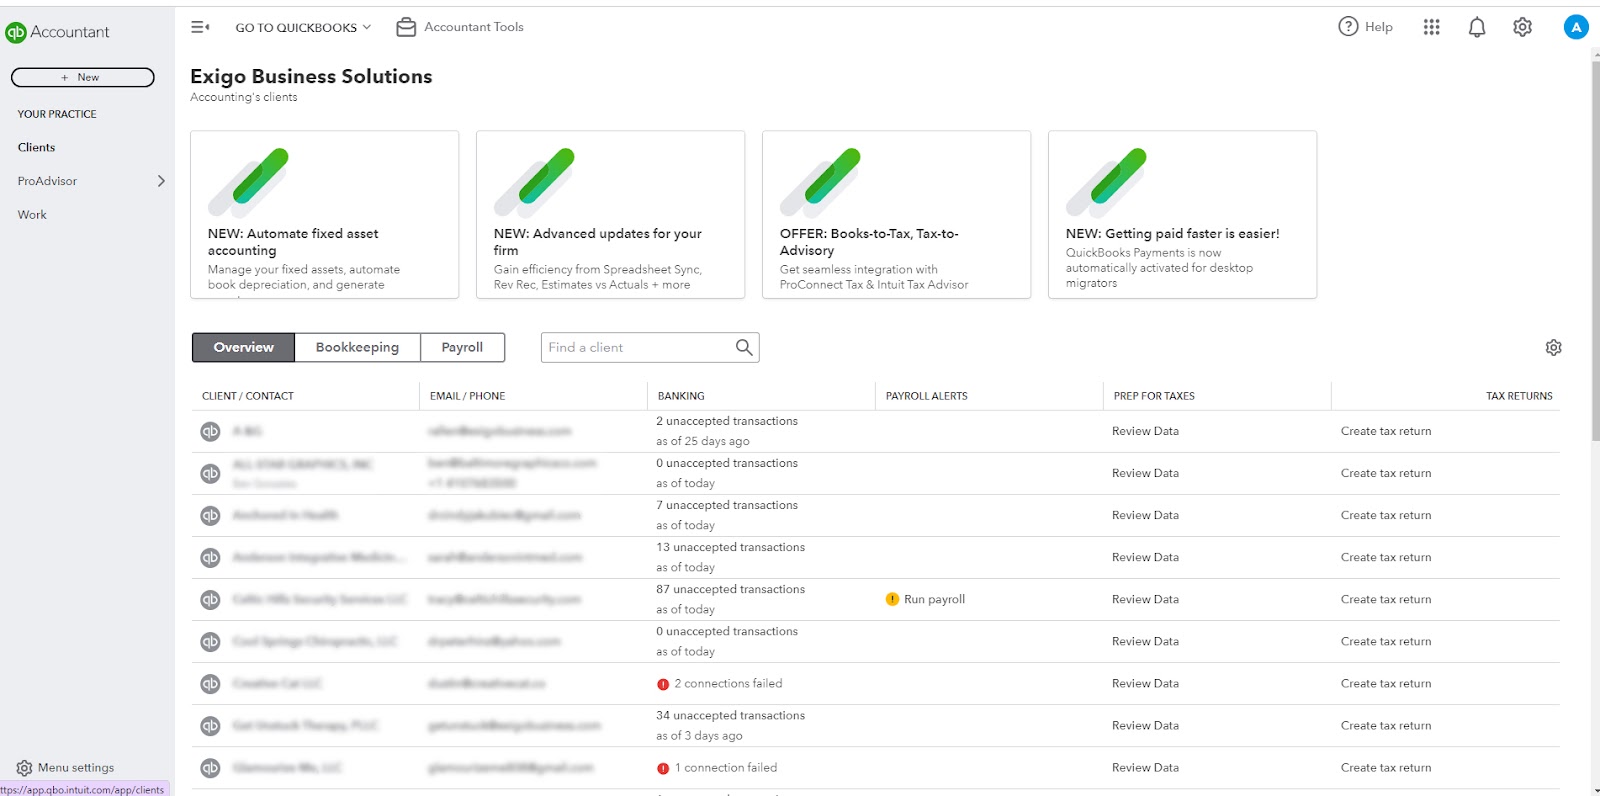
- Enter all outstanding Bank and CC transactions.
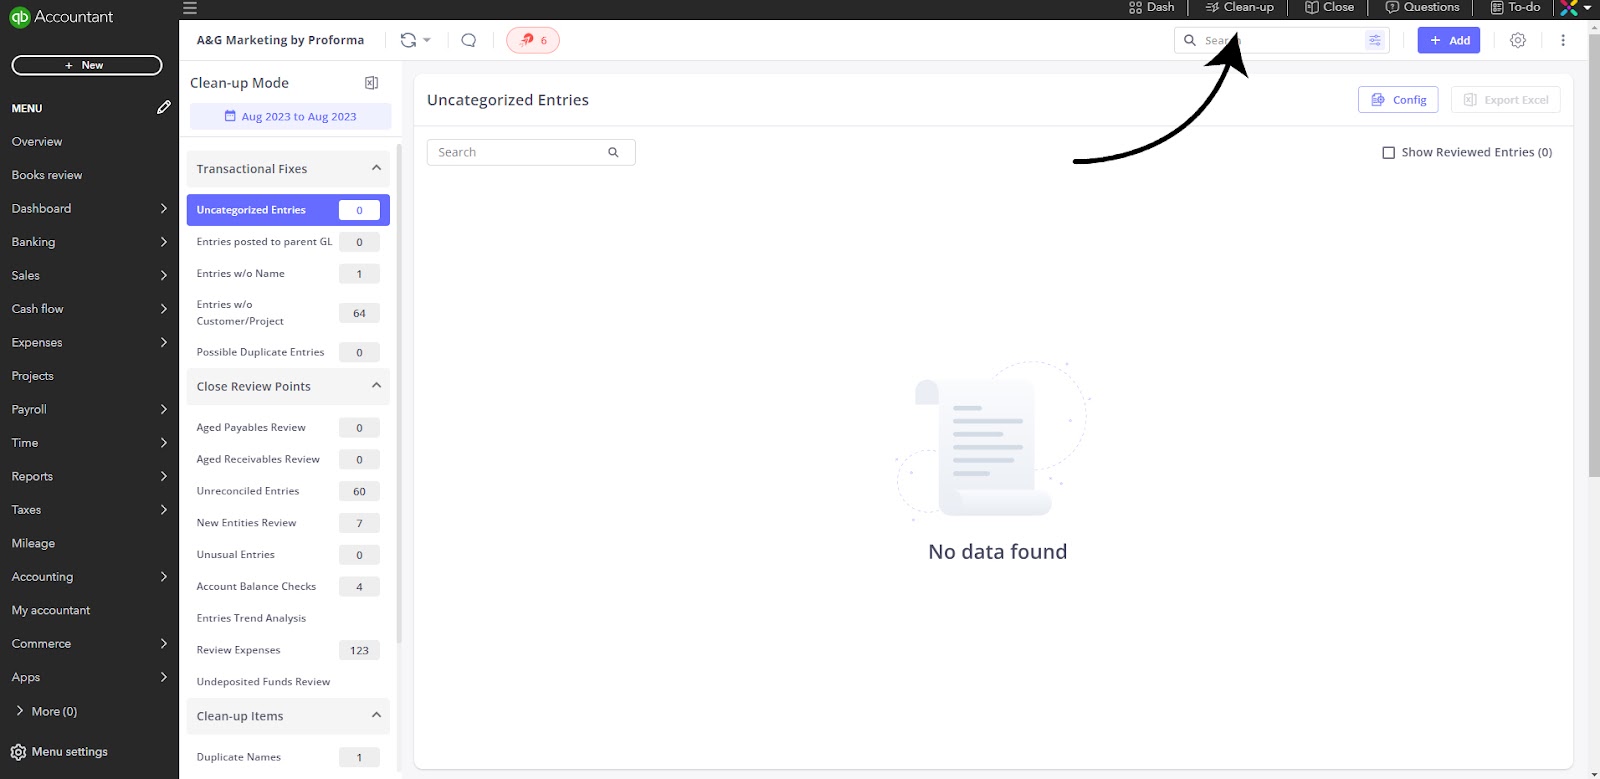
- Click on the Clean-up button at the menu bar.
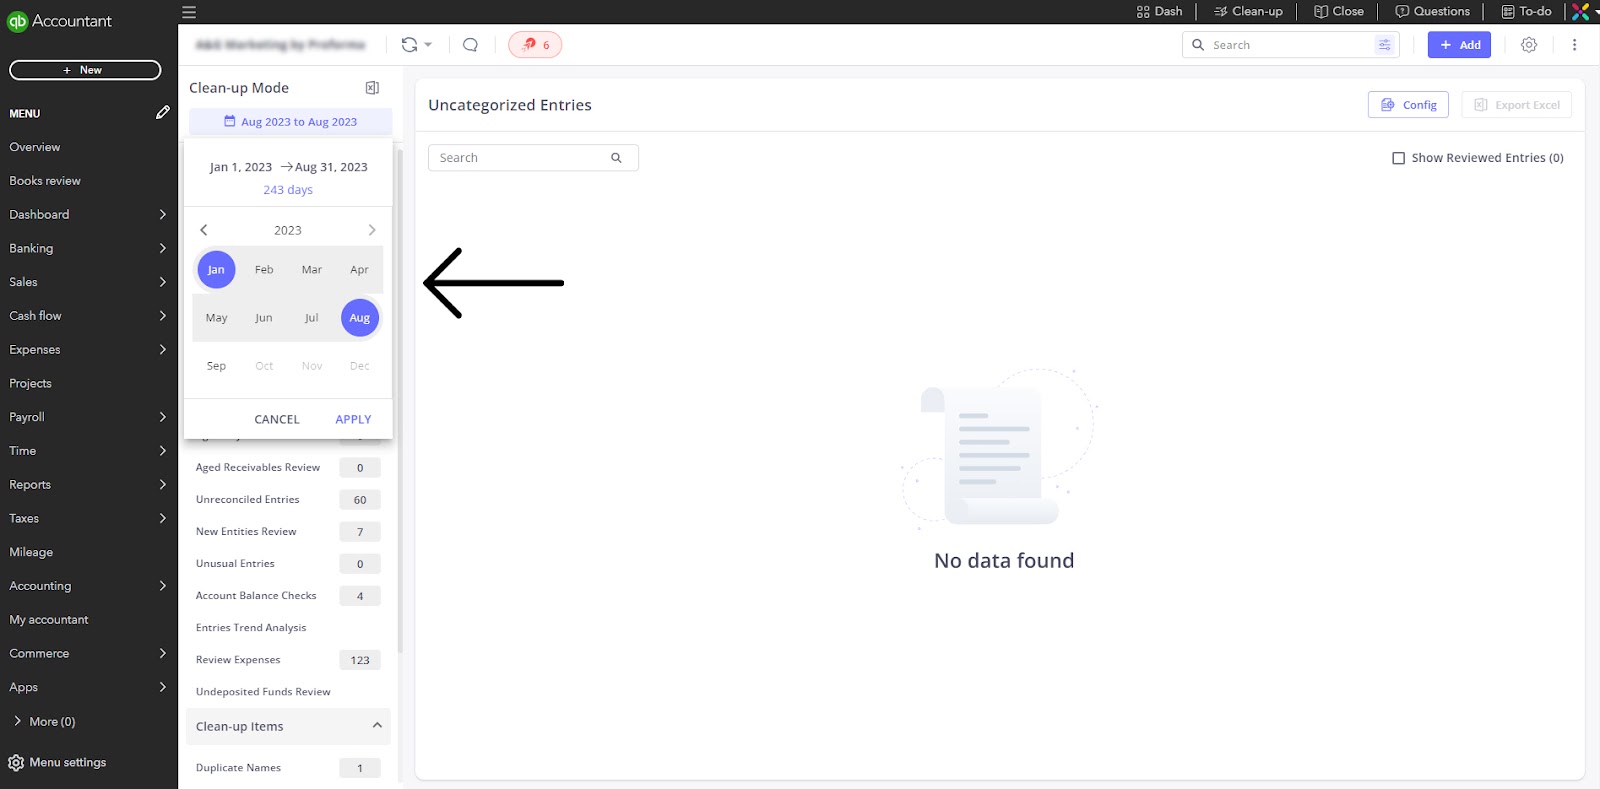
- Select months( From & To ) you want to review
- Start fixing the errors detected in your books.
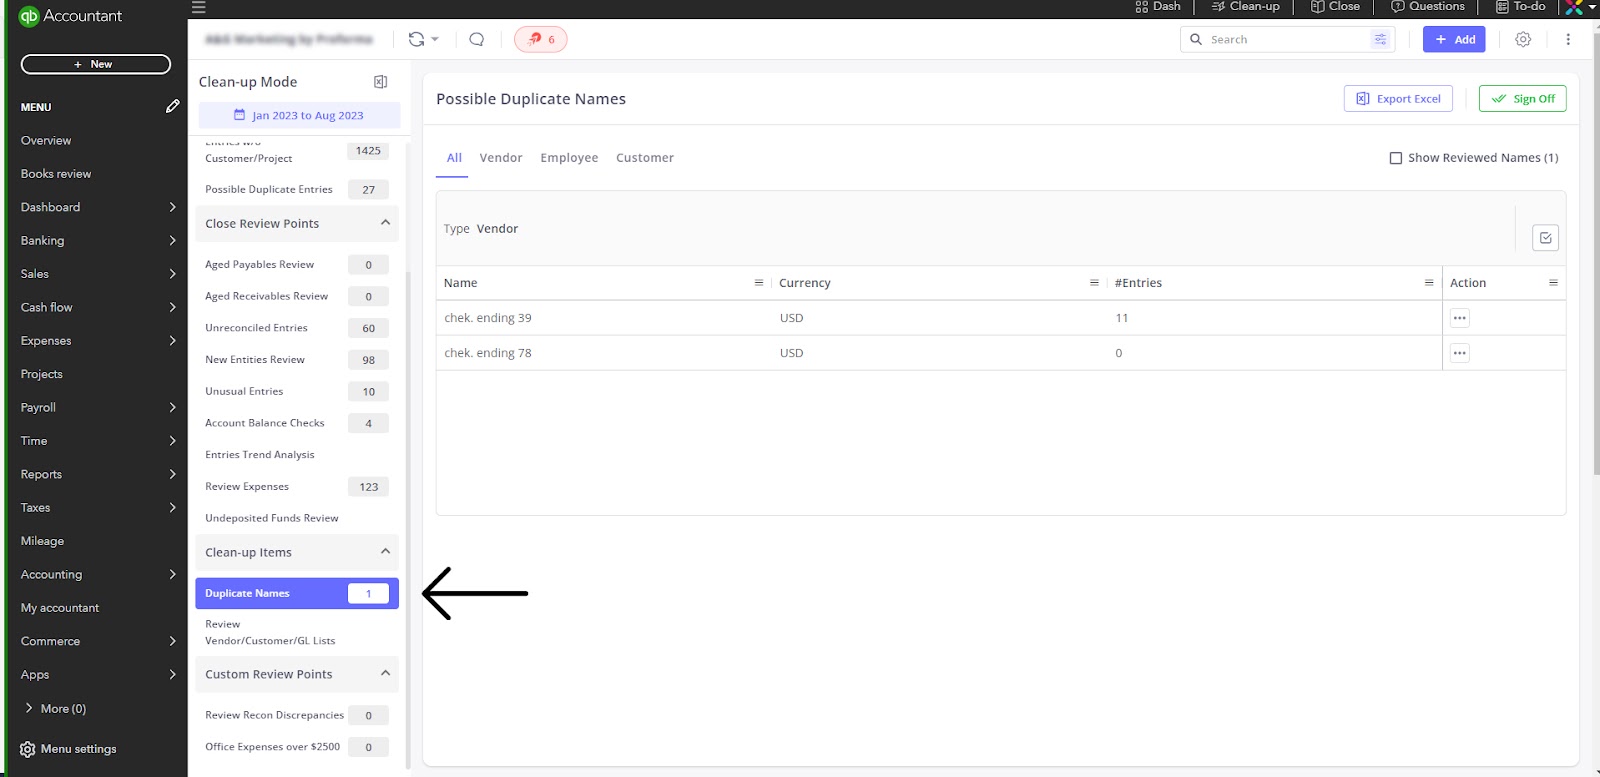
That is how you can find real-time errors, fix each of the errors in your accounting books, and always stay confident, ensuring your books are ready for the next fiscal year. Clean-up mode in Xenett is all about fixing errors found in your books. Once done, start the reconciliation process.
Reconcile your accounts
Here are the steps involved in reconciling accounts in QuickBooks:
- Go to settings.
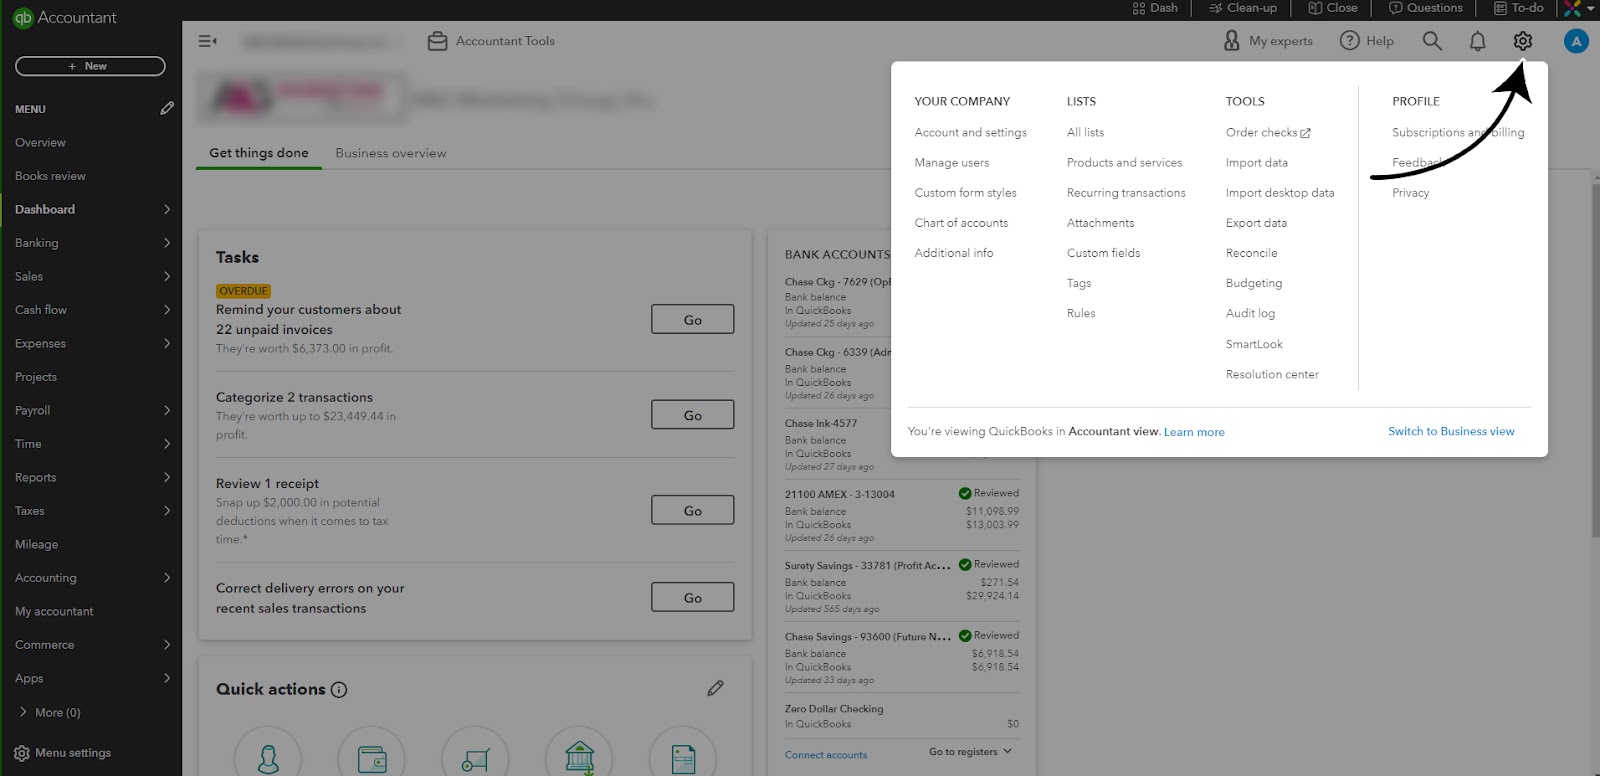
- Click on the Reconcile
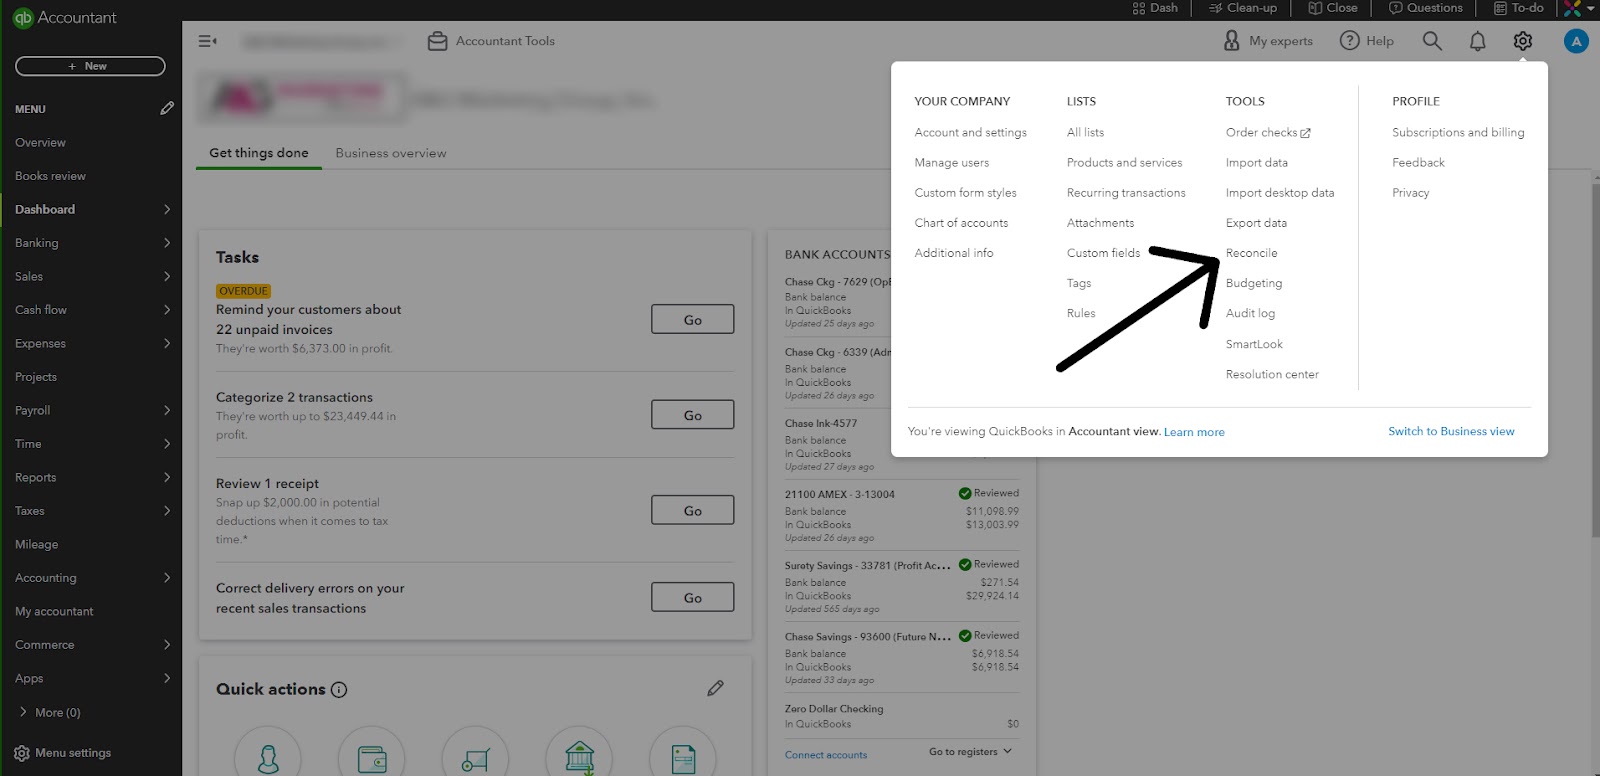
- Select the account you want to reconcile (Keep the statements ready alongside)
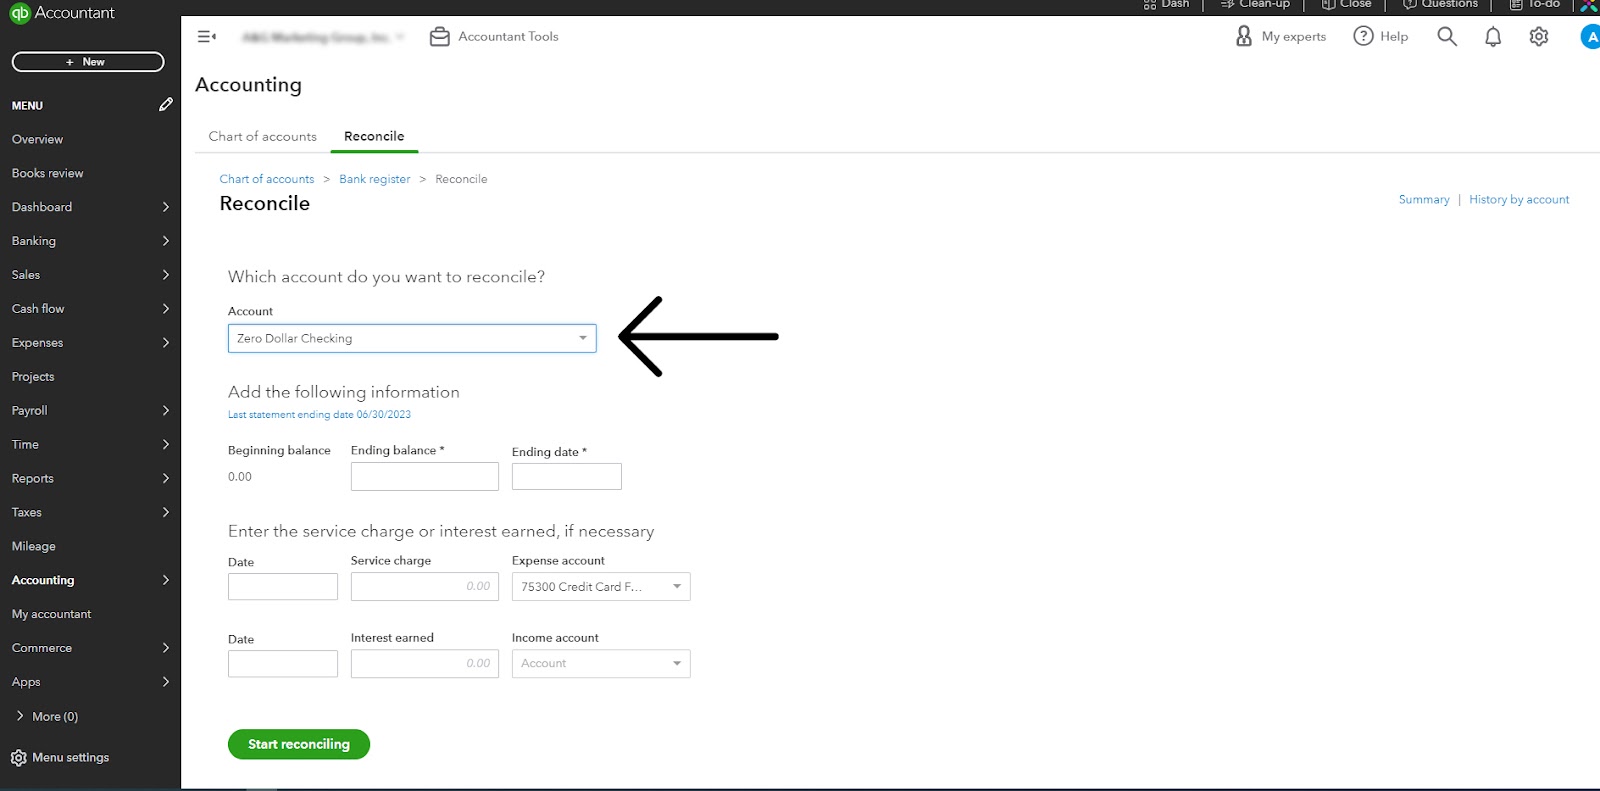
- Match the beginning balance in the Quickbooks record with the beginning balance in the statement.

- Enter ending balance and ending date
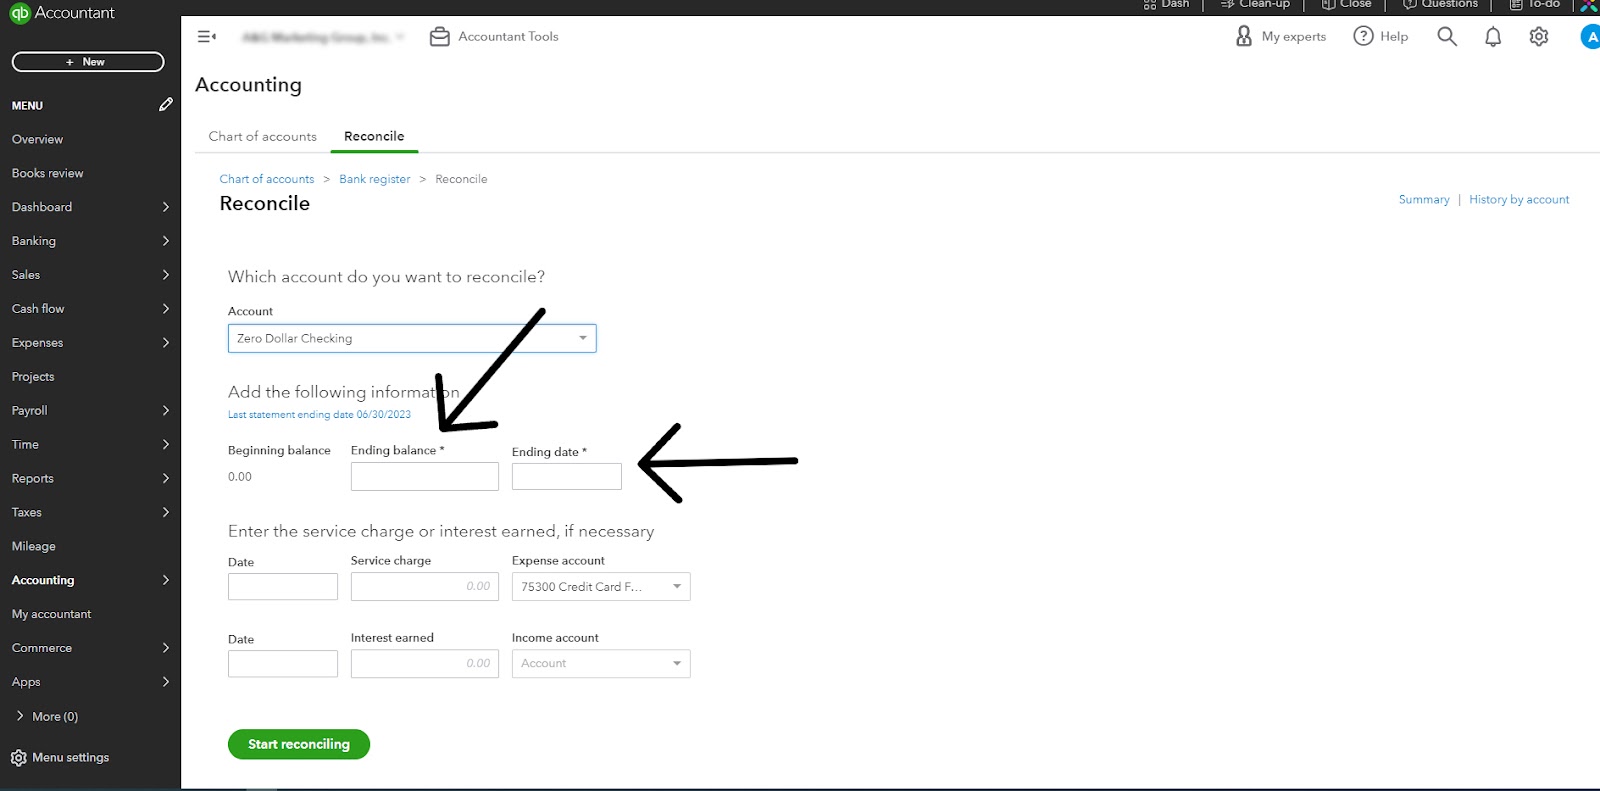
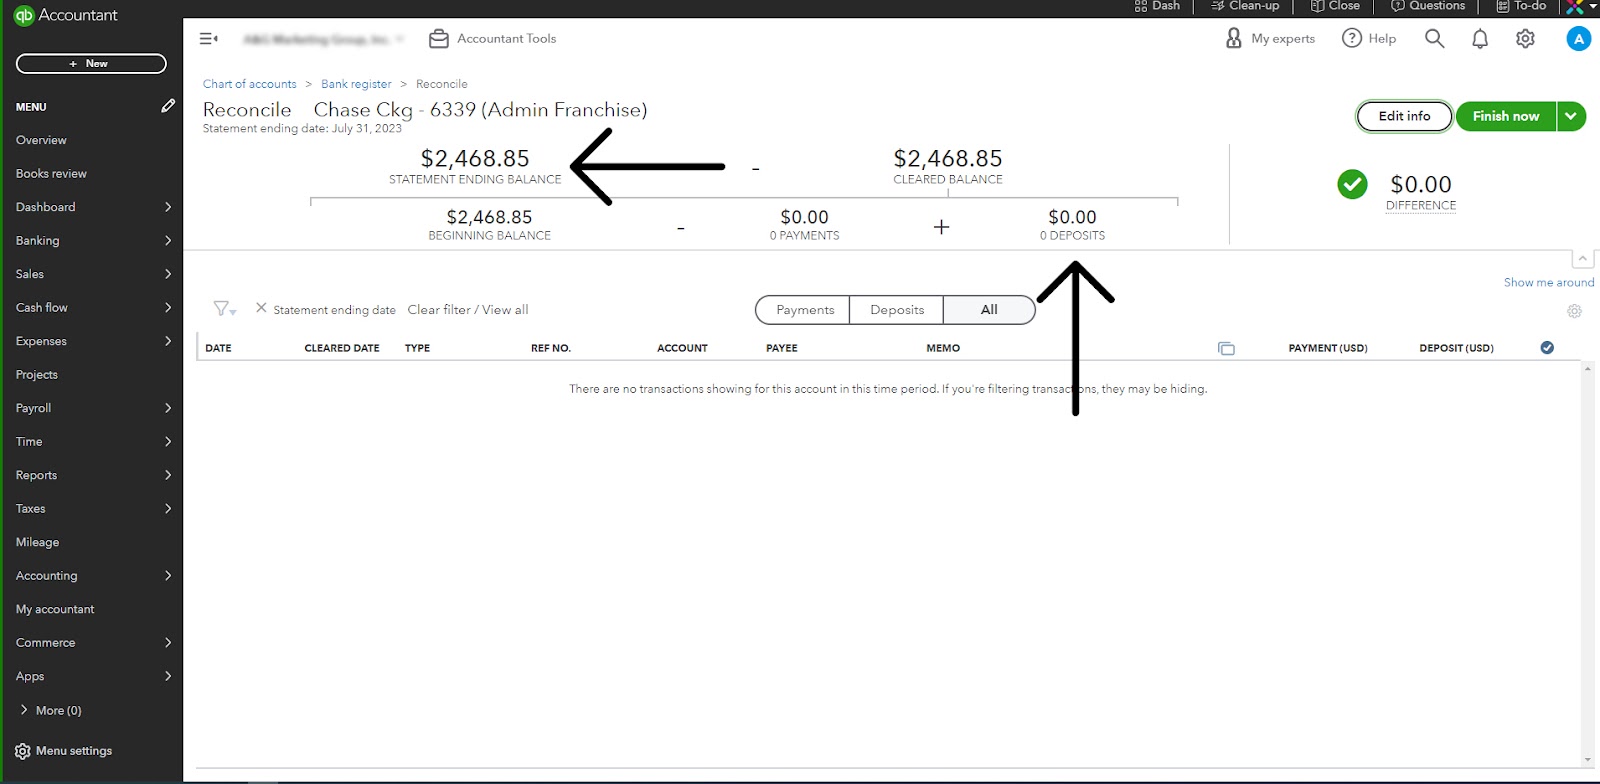
- Match the payment and deposit amount
- Check the difference (It must be Zero)
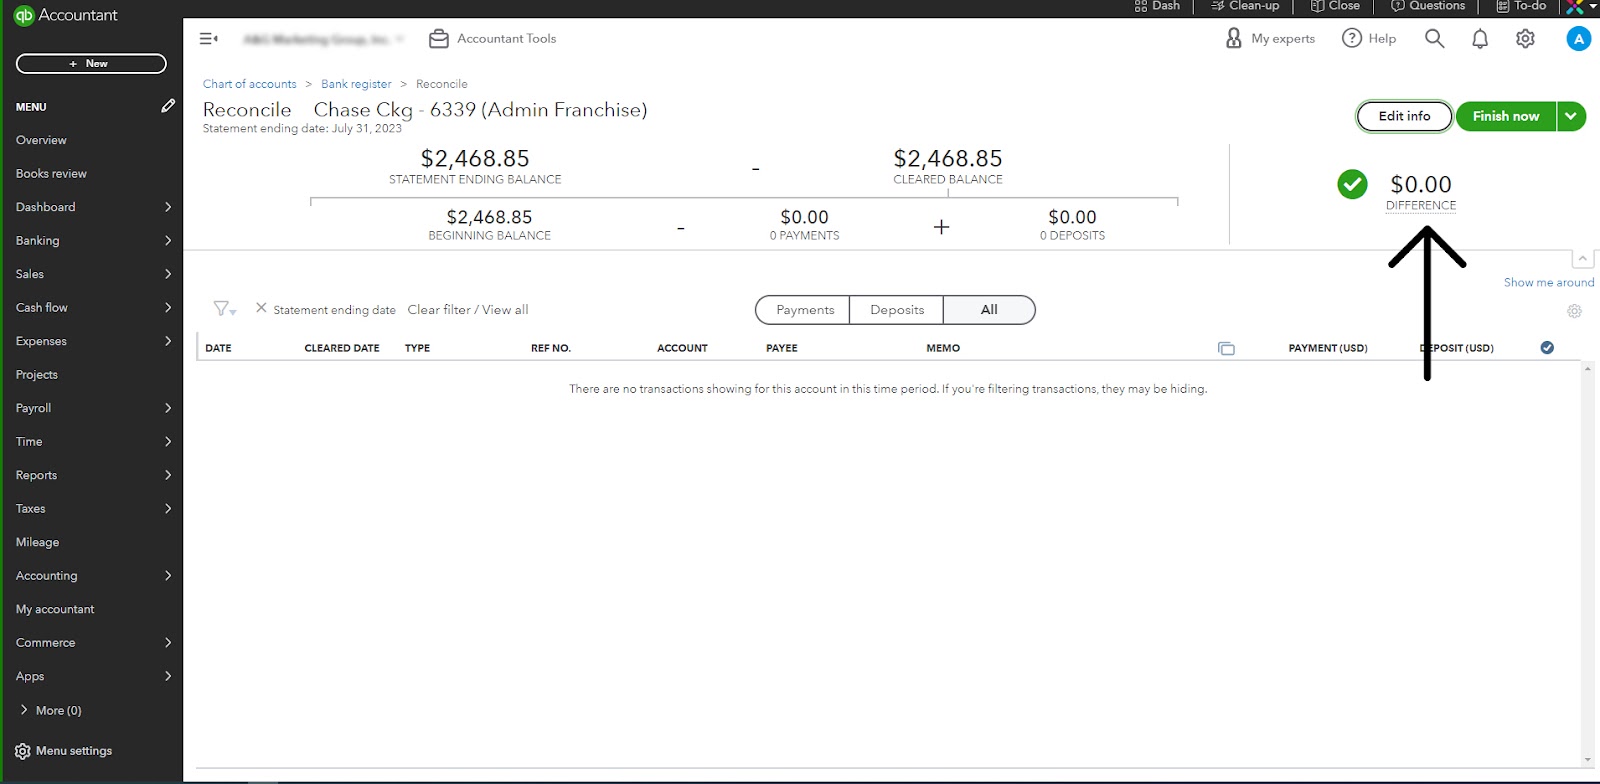
- Done
Make sure that all of your financial transactions in QuickBooks match your bank and credit card statements.
If the closing balance in QuickBooks does not match the ending balance on your bank account or credit card, there can be a manual entry error or a pending transaction that your bank has not yet cleared.
Resolve any discrepancies
When you find any discrepancies or errors, identify the root cause and fix them by taking necessary actions. You may need to examine transaction entries, adjust the account balance, or reconcile the balance between your books and the bank or credit card account statements.
By resolving discrepancies, you ensure that your financial statements are accurate and reliable. This is crucial for making informed business decisions and preparing books for the upcoming fiscal year.
Step 2: Close your books in QuickBooks desktop
Once review work is done and discrepancies are resolved, it is time to close your books. If you use QuickBooks desktop, follow the steps mentioned below to close your books.
- Click on the edit menu
- Choose preferences
- Accounting
- Click on the company preferences tab
- Click on the set date/password
- Enter the closing date
- Click OK
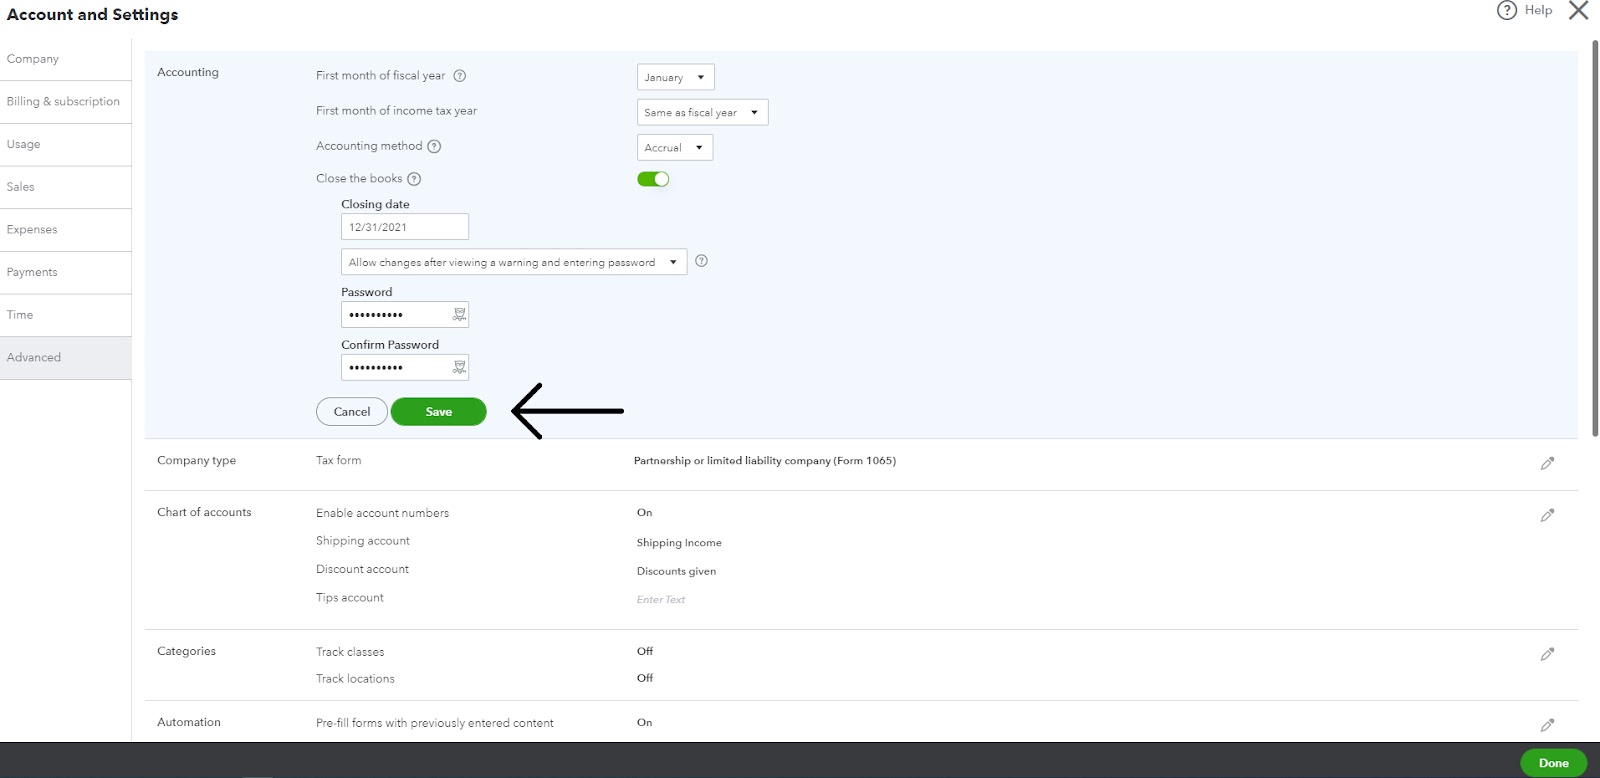
Step 2: Close your books in QuickBooks online
If you use QuickBooks online, follow the steps mentioned below to close your books.
- Go to settings and select Account and Settings.
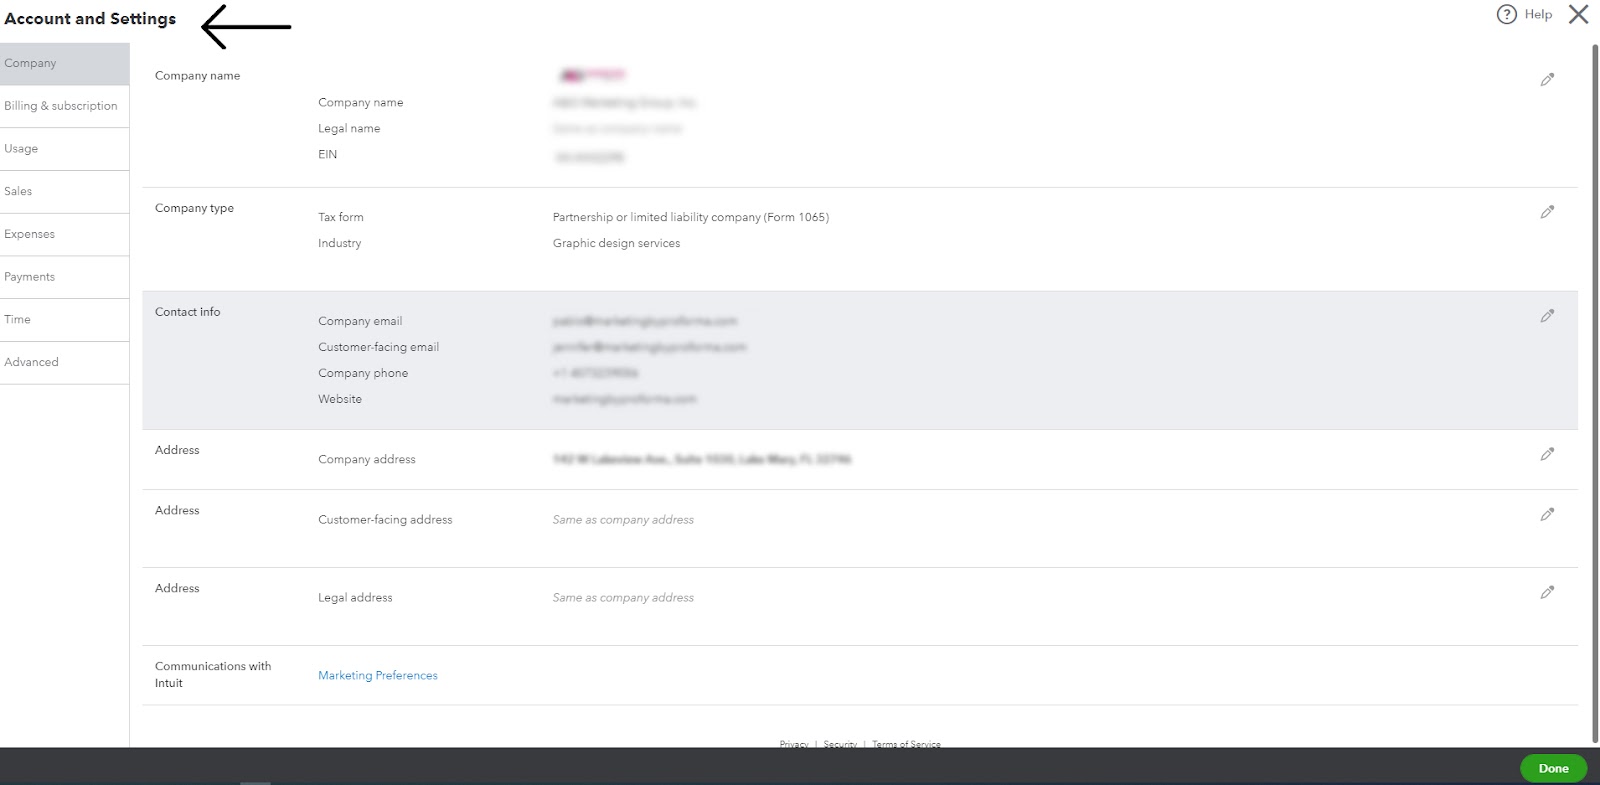
- Click on the advanced tab
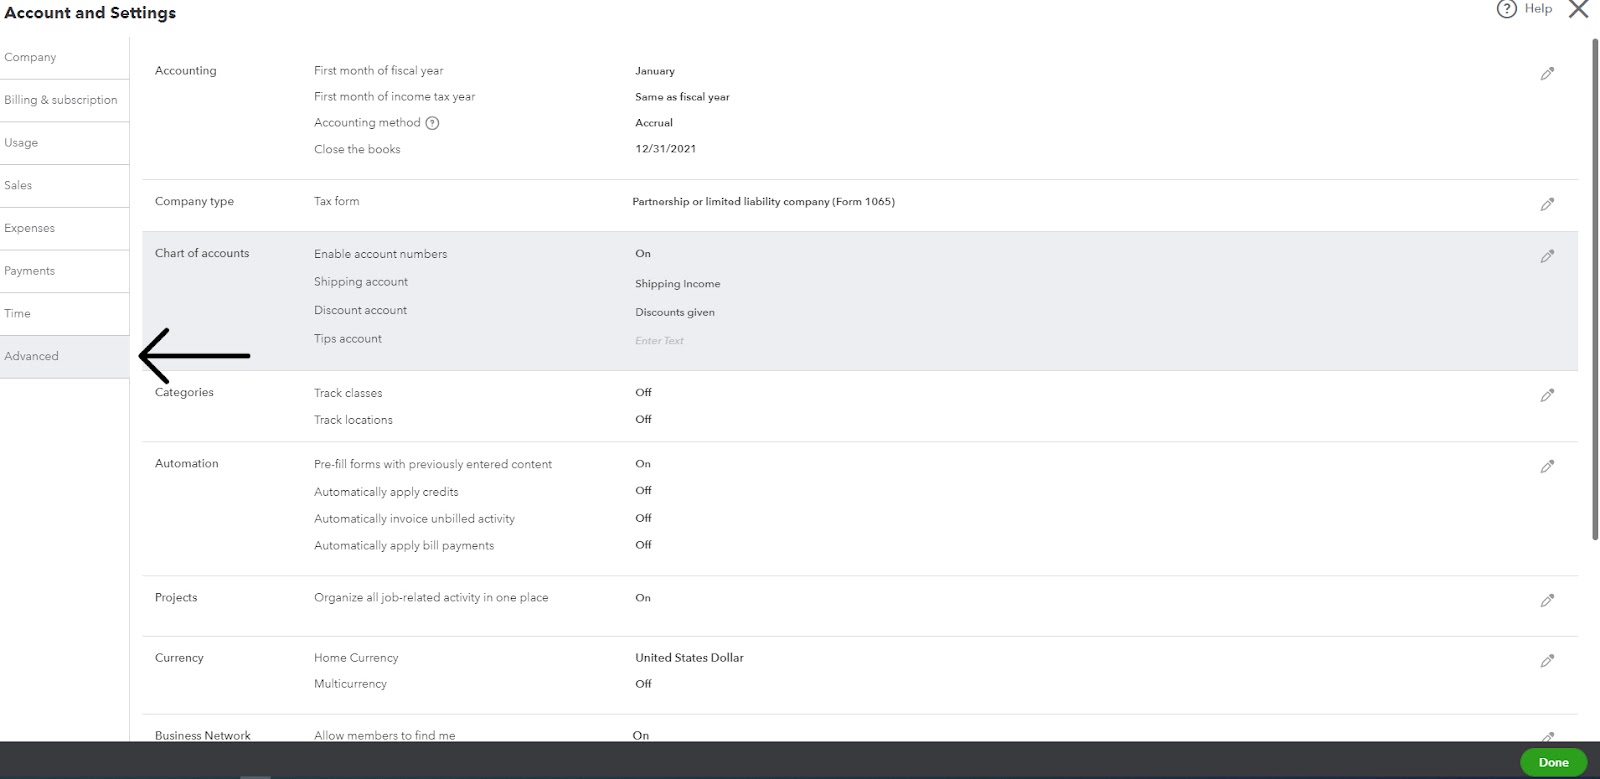
- Click on edit
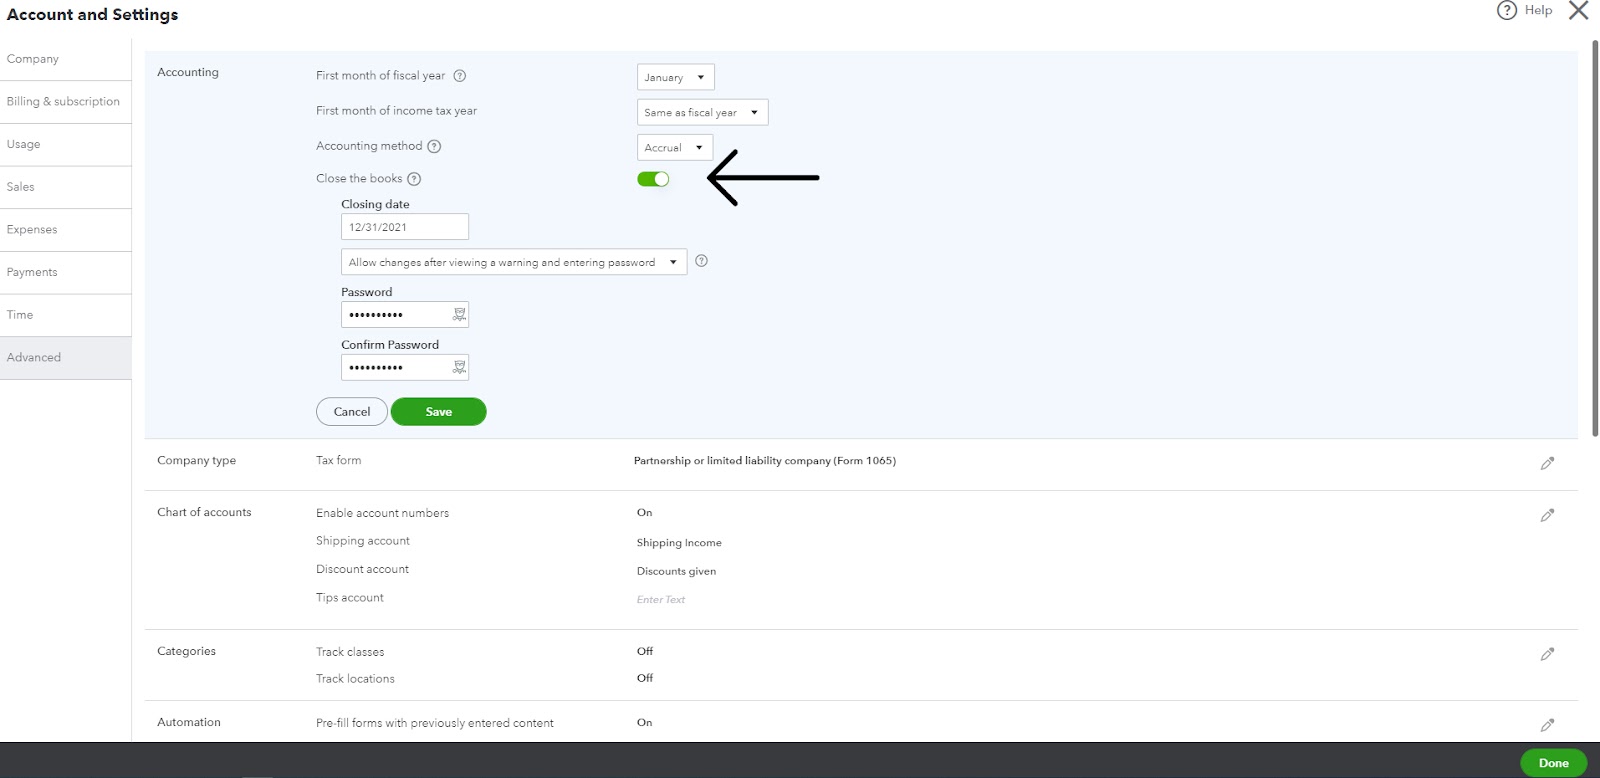
- Turn on the switch “Close the books”
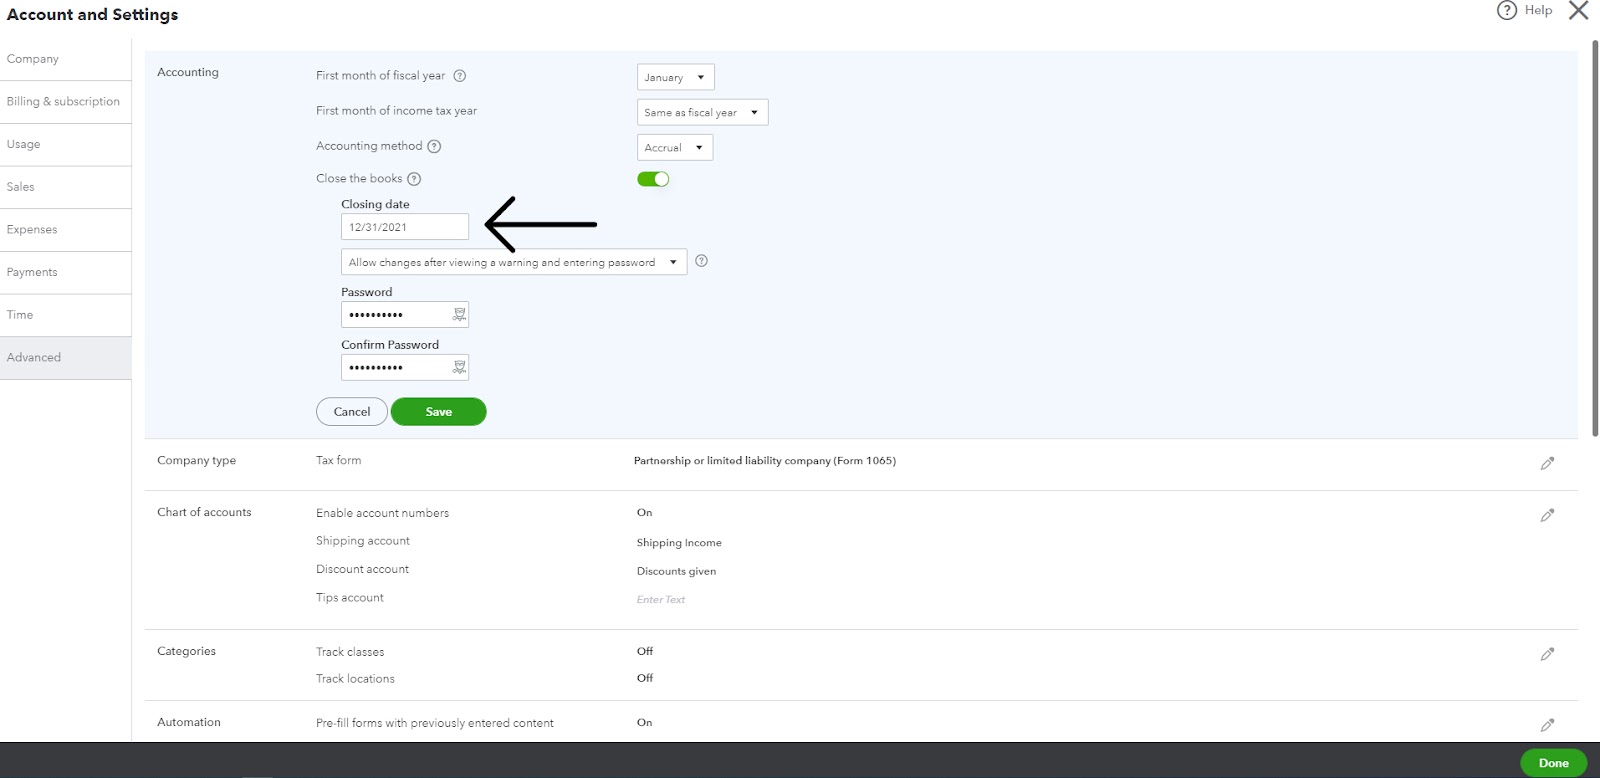
- Enter a closing date
- Select “Allow changes after viewing a warning and entering a password”
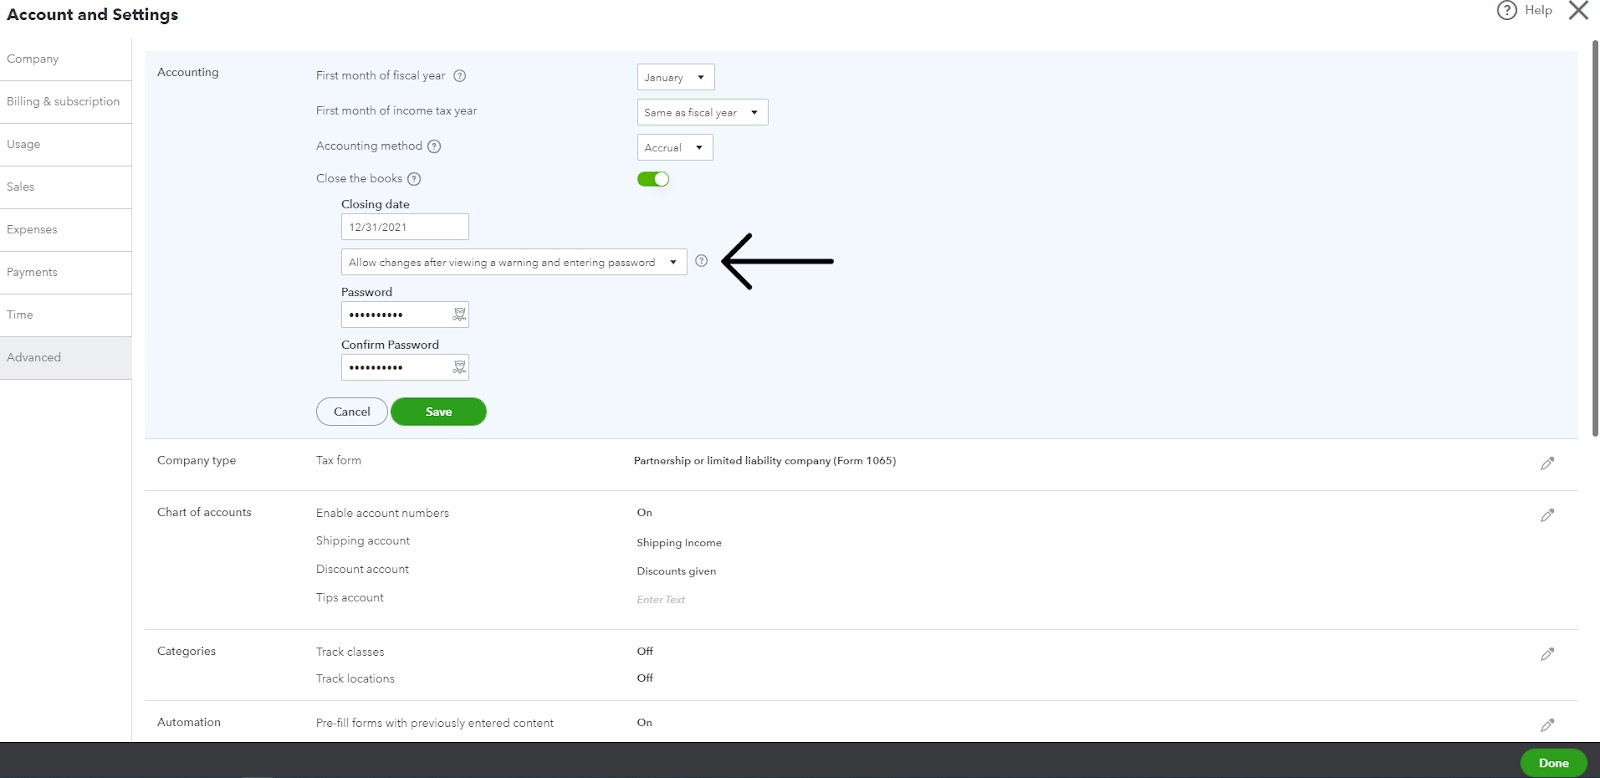
- Select save and then done
Step 3: Review your closing entries
Here comes one of the most important steps after closing your books in QuickBooks. Once you are done closing all your accounts in QuickBooks, the software will generate a report of the closing entries to your financial statements. You must review this report thoroughly to ensure that all of the entries are correct. If you identify any areas that require changes, please take the appropriate actions as needed.
Step 4: How to track changes made after closing the books
It is possible to make changes to a QuickBooks account even after the books have been closed with password protection. Most of the time, this can be beneficial, as it may allow you to correct any errors that were overlooked.
QuickBooks keeps track of all the changes in an exception report. You can find the Exceptions to Closing Date report under Reports. This report will display all transactions that were first recorded on or before the closing date and were updated after the closing date. Also, it shows who made those changes.
Also read: How To Prevent Common Accounting Errors During Year-End Close
The bottom line
Hopefully, you liked the modern way of closing the books with Xenett With Xenett, you can accelerate your year-end closing process by a remarkable 80%, not to mention the potential to reclaim hundreds of hours that would otherwise be spent reviewing the books. If you're keen to delve deeper into the benefits and functionalities of Xenett, we invite you to schedule a demo call at your convenience.